Saturday, November 28, 2009

Decorating Course... Part 10

This is the second class that I'd attended recently, to catch up on my missed ones. And it was in this one that I could really see how my 3 months of efforts would shape up. Until now, we were just making white flowers, which though looked good, didn't really look like the real thing. And many of the times, I simply wasn't convinced about the resemblance to a particular flower. Some just looked like little kids interprations! And I was bored! Bored! Probably you were too, viewing ALL those white flowers!

So this week, we actually got to see how our flowers would look, all colored and airbrushed and everything! And boy, were they pretty!! This was what convinced me that I was actually learning something productive! Read on, and you'll see how. Unfortunately, this was the ONE day I forgot to take my camera, the day I needed it the most. Sorry, the pictures aren't too clear, they were taken by my phone camera!

But first, we had to make some flowers!! First up, the briar rose, which looks, and is made similar to the azalea.

Petals for briar rose
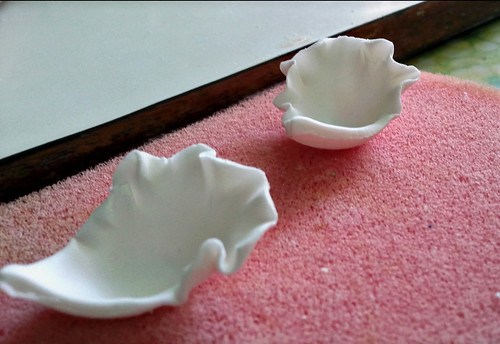
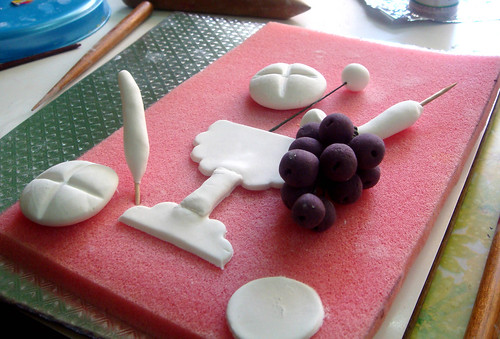
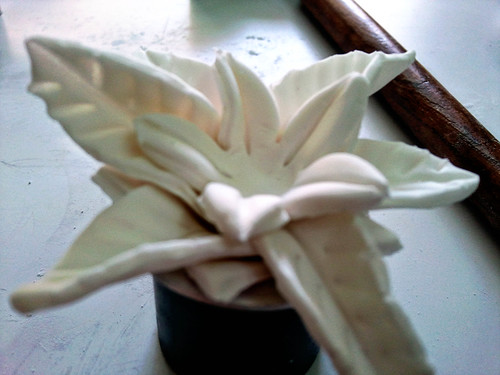
The petals being made.
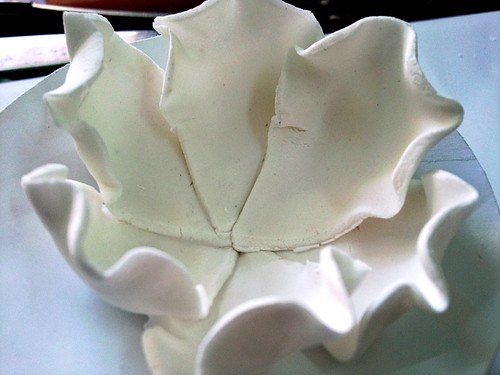
Briar Rose waiting
All assembled!

Up next, one of my favorite flowers!! The poinsettia!! It was soo easy.

Poinsettia waiting
It may not look like much now, but wait for a bit, and you'll see what I'm saying!


The main essence of this session was coloring the flowers, i.e making them 100% ready for display. Most of the flowers coming up were colored by an airbrush, however, I don't plan on investing in one soon, not until I perfect the flowers atleast.

Most of the flowers we colored -
Melee of Flowers

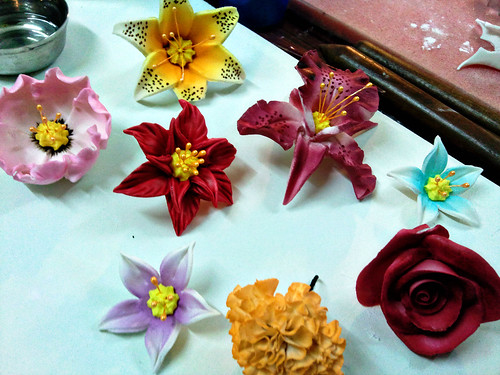
A different view to give you perspective -
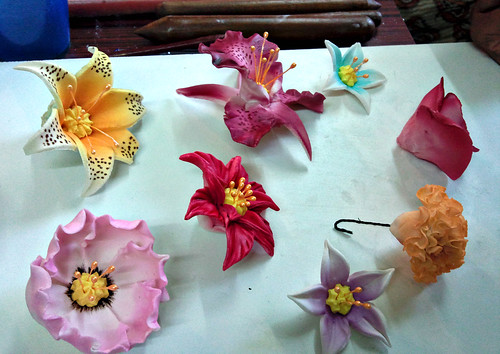
Melee of flowers - side view


Lily (2)
The lily.

Hibiscous
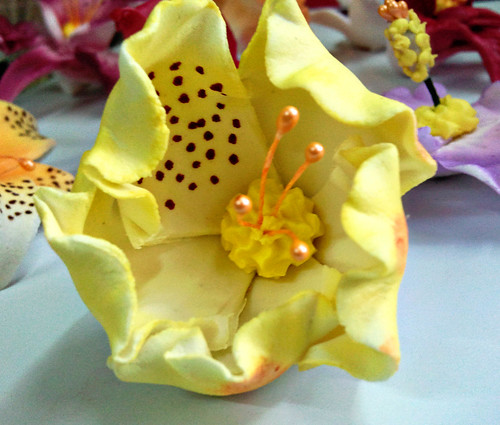
Hibisbcus. I love this flower, in real life. One of my favorites!

Azalea
The azalea!

Carnation (2)
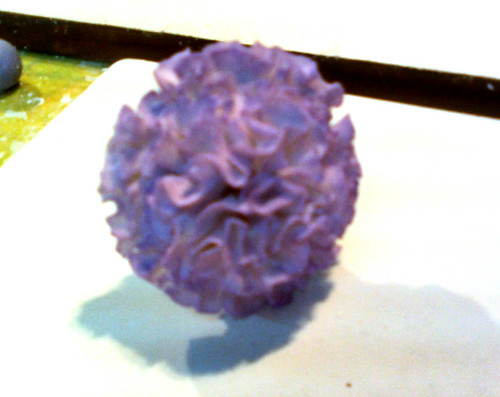
Carnation. Super blurry picture, but I love making this flower. So easy, and yet so pretty!

Rose
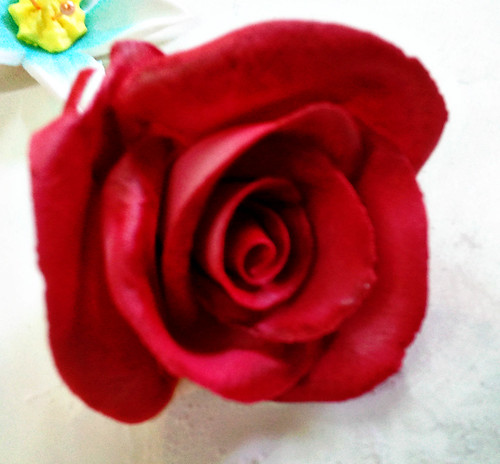
The rose! I'm going to start handing these out to people, they are so adorable! :)

Briar Rose
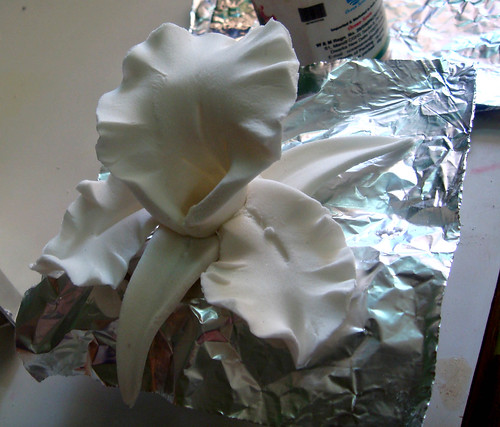
The Briar Rose. Never heard of this flower before, but it sure looks elegant!


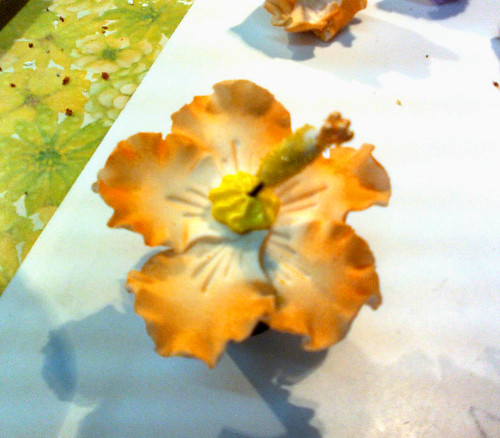
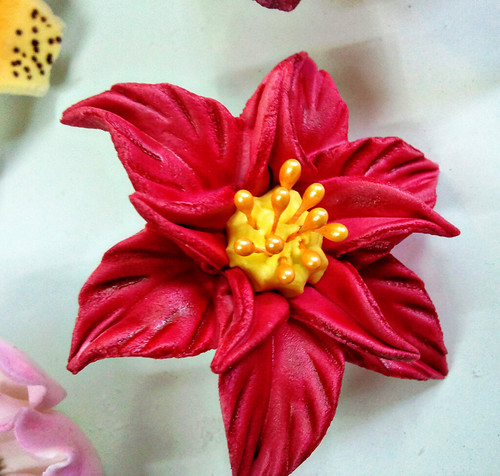
Aaand I've saved the best for the last! The best looking flower! Don't you agree?
Poinsettia


Read more on this course - Part 1, Part 2, Part 3, Part 4, Part 5, Part 6, Part 7, Part 8, Part 9, Part 11

Sunday, November 22, 2009

CSB : Burnt Sugar Vanilla Bean Pound Cake

burnt sugar vanilla bean pound cake slice

♪♪ I'm baacckkk!! ♪♪

The exams are FINALLY over, and thank god for that! A few more days, and I would have ended up in an institution! I'm loving being back online, there is SO much to catch up on!

In the weeks before the exams, I only had the time to bake this cake, the ONE thing I made. The Cake Slice Bakers were recently open to new members, and I'd joined last month. We are currently baking out of a promising book, Southern Cakes by Nancie McDermott. After missing last month's cake because of Diwali celebrations, I decided I had to make this.

The entire family had come over for dinner one day, since an aunt and a sister from Europe had come for a visit. I decided to serve it up that day. That explains the writing. I really wanted to use my newly acquired decorating skills some more, but I had barely managed to squeeze time out for making the cake! Plus, the frosting was way too soft for any serious decorating, I'd have to whip up another one just for it. Hopefully next time!

burnt sugar vanilla bean pound cake
Sorry about the horrible photo, it was taken inside the fridge! :P


The cake, though with so much sugar, wasn't really sweet. But the frosting was!!! If you lay it on real thin, like I did, it ends up being perfect! And plus, I successfully made caramel for this cake, something which almost always is a problem for me :) The cake was pretty good, it was gobbled up, but I don't think I'll be making it again!


Burnt Sugar Pound Cake
Adapted from Southern Cakes by Nancie McDermott
Buy from flipkart.com

Makes 2 9 inch rounds


Burnt Sugar Syrup

1 cup [250 g] sugar
1 cup boiling water - make sure it's really hot

Instructions -
  1. Heat the sugar in a heavy bottomed pan over the stove, stirring occassionally till it melts.
  2. After the sugar is completely melted, add the boiling water, taking care to stand a little
  3. away, since hot sugar can REALLY burn! And make sure the water is boiling, otherwise the sugar will cool too soon.
  4. Wait to cool, and then transfer to a jar or something heat resistant, for later use.


For the Cake -
3 cups [450 g] flour
1 tbsp baking powder
1/2 tsp salt
1 tsp vanilla - I used half of a vanilla bean
1 cup [240 g] milk
1 cup [2 sticks, 225 g] butter
1 3/4 cup [450 g] sugar
4 eggs
1/2 cup burnt sugar syrup

Instructions -
  1. Preheat the oven to 180 C [350 F]. Grease and line two 9 inch round pans.
  2. In a small bowl, combine together the flour, baking powder and salt. Set aside.
  3. In a large bowl, beat together the butter and sugar until creamy. Add in the eggs, beating between each addition. Now pour in 1/2 cup of the Burnt Sugar Syrup, and beat till incorporated.
  4. Now add about 1/3 of the flour mixture, half of the milk , beating between each addition to incorporate, without overbeating.
  5. Add the remaining 1/3rd flour, remaining milk, and the last of the flour in the same way.
  6. Pour into prepared pans, and bake for 20 to 25 mins [Mine took exactly 25 minutes].
  7. Cool in pans after baking for until you can handle the pan with bare hands, and then cool on wire rack.


burnt sugar vanilla bean pound cake ready from the oven

For the Burnt Sugar Frosting -

3 3/4 cup confectioners sugar
1/2 cup Burnt Sugar Syrup
1/4 cup butter
1/2 tsp vanilla [I used the remaining half of the bean]
2-3 tbsp milk

Instructions -
  1. Mix together the sugar, the syrup, butter and vanilla in a large bowl.
  2. Add the milk a tablespoon at a time, until you reach the desired consistency.

Assembling the cake -
  1. Lay the first layer on a cake board, and level the cake. This is an important step.
  2. Put on about 1/3rd of the frosting on the cake, and spread it out.
  3. Add the second levelled layer, and then frost the cake and sides as desired. Have fun with it!


burnt sugar vanilla bean pound slice

Wednesday, November 11, 2009

Decorating Course... Part 9

Yes!! You read right!! This series is finally back! After 3 long months, I recently went back to my decorating classes, to make up for the classes I missed out on! And it was SO much fun!! Once my exams are over, I'm going to be doing a lot of decorating!! :)

So I went to my class, without having had the time to brush up on my skills. The last decorating I'd done was atleast a month ago! And they could see that!!

Gumpaste orchid

It started off with them teaching us how to make an orchid, one of my favourite flowers, for sure!! I was super-excited to know that I'd be learning to make them!! And the best part is, the flower was pretty easy!! I mean, just look at the one I made, after not having touched gumpaste for oh so long!

My first Gumpaste orchid
I also realised how different it is, working in the cooler climate. Everything dries up soo much faster as compared to the monsoons!! You can see that in the zillion crazks on my flower! That was just a learning step though, I soon figured out that I need to work fast, fast, fast in this weather!

And then, we learnt how to make a communion cake, for which we were taught the book cake, something I've wanted to learn since forever!!

Stuff to go on communion cake

All the toppers!! The trick they gave us to make pages is oh so nifty! I'm going to put up a post on it soon!! Here's the assembled cake, with a few extra random stuff popped on it my over-enthusiastic people!!

Communion book cake ready

This class was soo much fun! I'd really missed them! Can't wait to get back at decorating.

P.S - This is a scheduled post. With my exams coming up, I have no time to make the usual rounds, chat online, and post regularly. My apologies to everyone! Can't wait to get back to the 'real' world, after exams finish!

Read more on this course - Part 1, Part 2, Part 3, Part 4, Part 5, Part 6, Part 7, Part 8, Part 10, Part 11

Monday, November 2, 2009

Nigella Lawson's Chocolate Biscuits

Sandy chocolate goodness

First up : I need to apologise for being away so long!! It's simply not right! I have my university exams coming up in 2 weeks time, and I've been studying hard for it! That's the reason I've been MIA around Twitter, Facebook, and the blogosphere! I mean, I don't even know what the Daring Bakers made this month!! With all the preliminary exams, and last minute assignments, i've had absolutely no time! That's why I've taken the day off, going to put up this post, and schedule a few more! Also going to take a much needed break, and simply not touch my books :)

The worst thing about studying so much is not finding any time to bake!! These biscuits [I think they are more like cookies] were the last thing I made, almost 2 weeks ago, to give away for Diwali! I'd seen them on Kate's blog, and I just knew I had to make them, reading her words decribing them! And she was right!! These cookies are really good! I'm not usually a fan of sandy cookies, but these were melt-in-your-mouth good! I'm not going to say much, except that you must try these!


Granny Boyd's Chocolate Biscuits
Adapted from Nigella Lawson via Kate

2 1/2 cups [300 g] self-raising flour - I used the usual substitute of a cup of A.P flour + 1 1/2 tsp baking powder + 1/2 tsp baking soda
5 tbsp [30 g] cocoa powder - Make sure you use good cocoa, since this is the taste!
2 sticks [250 g/1 cup] unsalted butter - Please, only use unsalted!!
2/3 cup [125 g] castor sugar

Instructions -
  1. Preheat oven to 180 C [350 F]. Grease and line a cookie sheet
  2. In a large bowl, cream together the butter and the sugar until pale and fluffy.
  3. Sift together the flour and the cocoa, and add it to the butter mixture. Mix together until it forms a homogenous dough.
  4. Refrigerate for about an hour, after which you roll into walnut-sized balls, and bake for 12-15 mins. These don't spread much, so you can put them pretty close to each other.
  5. Enjoy!
Do try these, and let me know how you liked them! Miss taking the rounds of the blogosphere. See you in about a month's time! I have scheduled a few posts till then! Bye, wish me luck :)
Related Posts with Thumbnails