



Showing posts with label pies/tarts. Show all posts

Sunday, July 6, 2014

Strawberry Lattice Pie

Strawberry Lattice Pie 5

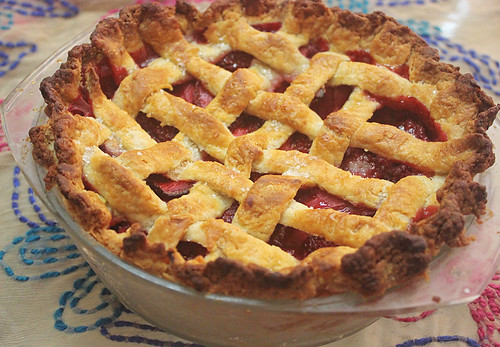
Pie is just one of those feel good things, isn't it? The happiest & the most, um, romantic - not in the I'm in love kind of romantic, but more like the this is something that's been happening in homes all over the world for more years than I've been alive - thing to me is probably taking steaming hot pie with bubbling berry filling out a hot oven with a nice thick oven glove. Or maybe that's just me, I can romanticize just about anything.

But once a few weeks ago (yes, I've become lazy), I felt the urge to make something that would make my heart swell with pride on making something nice that would make the house smell wonderful, while still being nonchalant about it since it really wouldn't be a big deal. And with strawberries on the market just about everywhere & nice big box of them lying on my dining room table, it all just fell together perfectly. Making a simple double crust wouldn't be enough, this HAD to be a lattice pie because that's the imagery I'd grown up with. Not knowing how to make one didn't matter. It had to be done. And after following Simply Recipes' instructions, it was done. No problem. Nothing to be scared of really, it was - forgive me for this - easy as pie ;)
Strawberry Lattice Pie 1
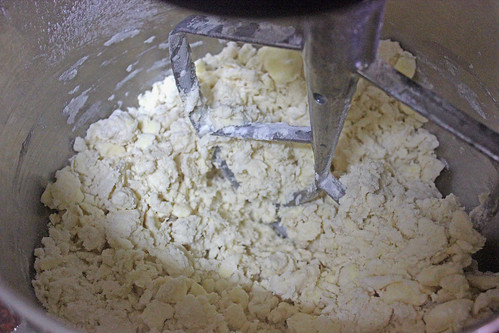
I made the crust in my KA this time rather than laboring with the pastry cutter. So much easier
Strawberry Lattice Pie 2
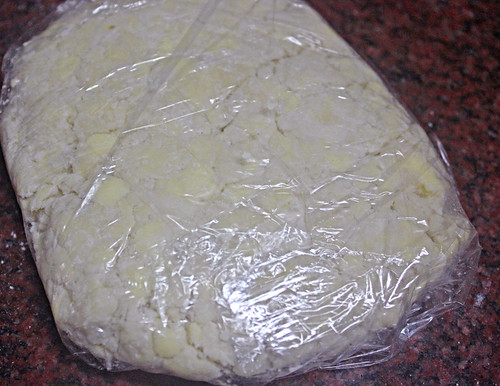
Look at those beautiful specks of butter. Flaky crust alert :)
Strawberry Lattice Pie 3
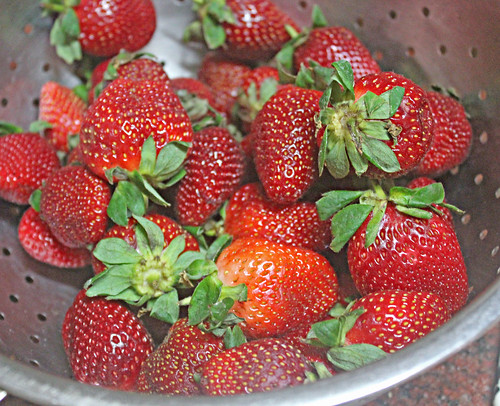
Such gorgeous strawberries that it felt like a sin to cut them up.

Strawberry Lattice Pie 4
Admittedly, this isn't the best, but pretty good for a first try, right? Any tips for the next time?

Strawberry Pie
For the pie crust
I used my favorite pie crust recipe

For the filling
Adapted from Happier Than A Pig In Mud

4 cups strawberries, sliced thick
1/2 cup [60 g] flour
1/2 cup [100 g] sugar
A couple pats of butter-optional
1 egg yolk - To paint over pie - optional
Sprinkling of coarse sugar - optional

Instructions:
  1. Preheat oven to 350 F [180 C].
  2. Roll out & place one half of the prepared dough on the bottom of a greased pie pan. Add pie weights, separated from the dough by a layer of foil or parchment paper [I use some grains that I've kept solely for this purpose]. Bake for about 15 minutes until lightly browned. Remove & cool to room temperature.
  3. De-hull & chop the strawberries into 3-4 pieces [you don't want to cut them too small]. Add sugar & allow to sit for 10 minutes. Now toss with the flour till well coated, and add into the baked bottom layer. The mixture should come well up to the top of the pan
  4. Add the pat of butter, if using.  Prepare the lattice [follow the instructions linked above]. Use a brush & paint the beaten egg yolk over the pie. Sprinkle the sugar on top.
  5. Bake for 40-45 minutes until mixture is bubbling & pie is golden brown
  6. Enjoy hot, with some ice-cream to the side :)

Sunday, October 13, 2013

Chocolate Truffle Tart

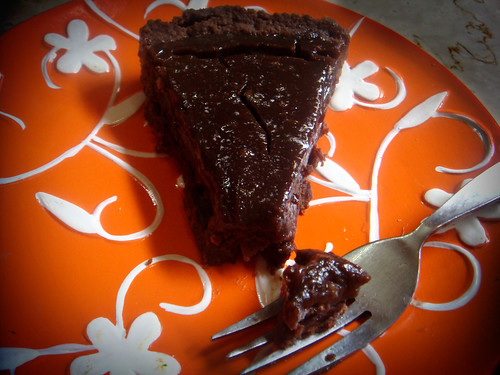
Chocolate Truffle Tart

What do you when craving strikes? A craving so bad that a piece of your favorite chocolate bar, brownies that you love munching on day or night, or even the mud cake from your favorite restaurant in the city won't do? And even better, what do you do when this craving strikes at 2 am on a working night, with a persistence that you know won't subside?

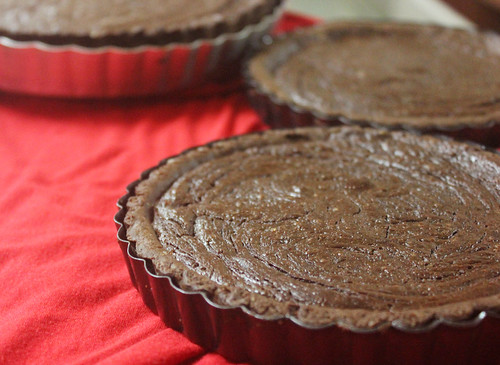
If you're me, you make this tart that you'd bookmarked a while away but never gotten around to making. It's perfect because it's quick, and no weird ingredients, just the pantry basics. With a nice dollop of ice cream, in less than an hour you're golden, with the intense craving fulfilled and a euphoric feeling about you.

Chocolate Truffle Tart

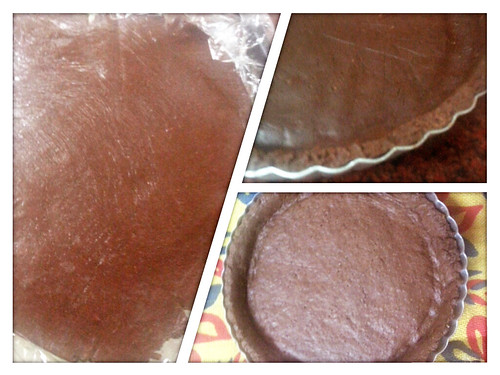
The original recipe from Gourmet uses chocolate Nabisco wafers for the crust, which aren't available here. I've seen some variations of it with a normal pâte sucrée, but since I was trying to satisfy a mean craving, I went with a gorgeous chocolate tart dough by Johnny Iuzzini. And what a great decision that was...the biscuity tart base went perfectly with the rich, dense chocolate filling, highlighting the richness of the filling even more and yet standing out by itself as a great dessert. And the best bit? No pastry cutter, keeping the butter cold, oh so delicate touch needed, I made this in my KA!

Chocolate Truffle Tart

Chocolate Truffle Tart

For the Chocolate Tart Dough
Recipe from Dessert FourPlay by Johnny Iuzzini [India | USA | UK]

10 tbsp [114 g] cold unsalted butter, cut into pieces
3/4 cup sugar
1 tsp salt [omit if using salted butter]
1 large egg
1 large egg white
2 1/2 cups [300 g] all-purpose flour
1/2 cup [40 g] unsweetened cocoa powder
1 tsp baking powder

For the chocolate filling:
Adapted from Gourmet.com
1/2 lb [8 oz] fine-quality bittersweet chocolate (no more than 60% cacao if marked), coarsely chopped
3/4 stick [6 tbsp / 90 g] unsalted butter, cut into 1/2-inch cubes
2 large eggs, lightly beaten
1/3 cup heavy cream
1/4 cup [50 g] granulated sugar
1/4 teaspoon salt
1 tsp vanilla extract

Equipment needed:
9 inch springform pan or an 8 inch tart pan & two 4 inch tart pans

Instructions-
  1.  For the chocolate tart dough: In a large bowl, cream together the butter and sugar until soft. Add the salt [if using], the egg and the egg white, beating between each addition.
  2. In a separate bowl, sift together the flour, cocoa powder and baking powder. Add this to the butter mixture, and beat till it comes together.
  3. Shape into a round disc, wrap in cling film and refrigerate for half hour.
  4. Preheat oven to 375 F [190 C], and roll dough out after refrigeration [I always roll out between sheets of parchment / cling film]. Line the tart pans of your choice, then put a layer of parchment, and fill with pie weights or coins. Bake for 20 minutes.
  5. For the chocolate truffle filling: Melt the chocolate and butter together over low heat. Cool to room temperature
  6. Add the eggs, the heavy cream, sugar, salt and vanilla extract. Pour into baked chocolate tart shells and bake for 20 minutes, until filling is just slightly jiggly in the center.
  7. Serve warm with a dollop of ice cream

Monday, December 5, 2011

Chocolate Pecan Pie

Chocolate Pecan Pie


Hello there :) I can't believe how much I've stayed away from this blog. My exams are up in week, term 1 is already set to end. It's been surprisingly hectic, so much work. I literally have had no time to bake, but on the bright side, have been learning to cook pretty well. Seems I actually have the ability. Who would have thought? My day's schedule has become like - wake up, shower, hurry for class, do some group work, come back for dinner, then go back to the business school and study late into the night. Sleep isn't even considered. I'd be quite near burnout, if not for the fact that exams will be over in 10 days :D

Anyway, the other day I decided I needed a break, and also with the Secret Recipe Club's deadline looming, decided to do some baking. I spotted pecans at the grocery store long ago, and picked them up for snacking. I'd wanted to make a pie with them for thanksgiving, but since that didn't pan out, I zoomed in on Kim's Chocolate Pecan Pie. This month's blog assignment for me was a very nice one, I reallly wanted to try her red velvet cupcakes, and probably will, soon.

I made this pie at 5 am a few days ago, when I got back home. And I was so glad I did. It made the home smell amazing, my flatmates were so pleased :) And did I tell you how much I love the weather here? Making pie crust is so easy, there's absolutely no worry about the butter melting! The chocolate layer is nice and dense, with the pecans providing a wonderful texture, and the crust is a perfect complement. I used my standard pie crust, and made the filling from Kim's site.
Chocolate Pecan Pie


Chocolate Pecan Pie.

For the pie crust -

Use half of my standard pie crust recipe.

For the filling

3 oz. semisweet chocolate, chopped
1 stick [113 g] butter
2 large eggs
3 tbsp flour
1 tsp vanilla
1 cup pecan halves

Instructions  -
  1. Preheat oven to 350 F. Prepare a pie plate with a bottom crust. 
  2. Melt together the chocolate and butter and in a  medium saucepan. Set aside to come to room temperature.
  3. Whisk the eggs and add into the chocolate mixture.
  4. Now add the flour, and vanilla, stirring until just combined.
  5. Now stir in the pecan halves, and pour onto unbaked pie shell.
  6. Bake for 55-60 minutes, until the filling looks set.
  7. Serve along with cream or ice-cream for a decadent treat, or just as is .

Monday, February 21, 2011

Fresh Fig Tart

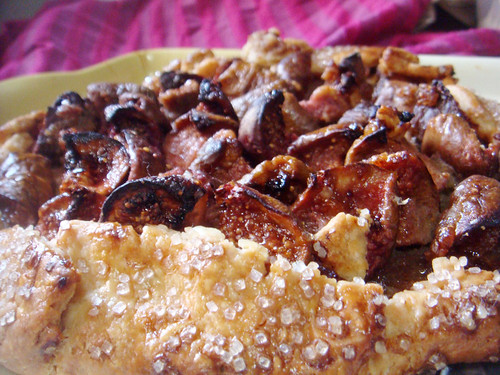
Fig Tart


One thing I love about blogging is how it's making me experiment more, and not bake my usual things all the time. The other day I saw figs at the stall below my building, and while I wouldn't ever give a second look a year ago, now I was intrigued, and bought some without any idea about what I was going to do with them. Turns out, fresh figs aren't really used that much, I saw mainly two uses.. a fig tart, or figs wrapped in prosciutto, both very interesting ideas. Since I only bake desserts, [I've never ever made anything savory in my life!!], I went with the tart, though if someone were to make the proscuitto one for me, I'd gladly devour!


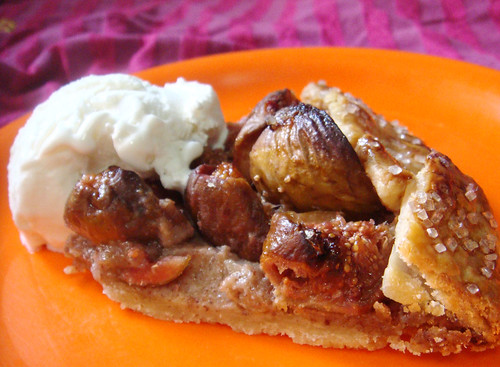
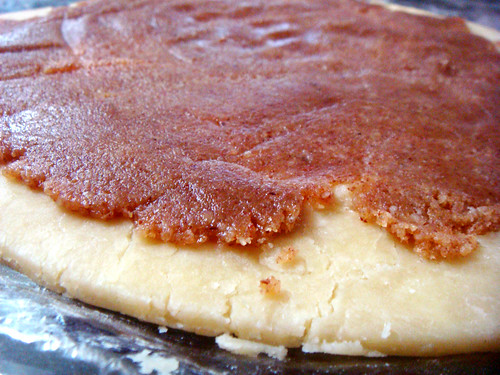
It was super quick and easy to make, since I already had some frangipane in the freezer, all I had to do was whip up some pastry, and be done. It tasted really good too, the figs sort of tasted like softer, moister dried figs [well duh, but I had no idea what to expect, I'd never tasted fresh figs before], and the frangipane provided some much needed sweetness! I served with a scoop of vanilla ice cream, but would have to loved to whip up some fresh fig ice cream from  David Lebovitz's awesome book, [India] or try another master's adapted version.


Frangipane


Fresh Fig Tarts
Recipe from the Foodie Handbook via ChezPim

1 9" pastry dough [1/2 of the recipe]
About 10 large or 15 small figs
1/4 of the frangipane recipe below [It's really good, so make the whole amount and use up the rest somewhere else]

Frangipane
75g [about 1/2 cup] whole almonds
75g [1/3 cup] granulated sugar

75g [about 3/4 stick] butter, at room temperature
1 large egg


Instructions - 
  1. Preheat oven to 350 F [180 C]. Lay the almonds on a baking sheet and roast for about 10 minutes, ot until lightly toasted and fragrant. Allow to cool.
  2. Once cool, process together the almonds and sugar in a food processor until fine and powdery. The sugar helps prevent the nuts forming a paste. Add the chopped butter and eggs and pulse till well combined. Use immediately, or store wrapped in cling film for upto a month in the freezer.
For the tart - 
  1. Roll out the chilled pastry to about a 10 inch dish, and lay in the tart pan if using, or leave as is.
  2. Spread out 1/4 of the frangipane on the pastry, leaving a 1 inch border along the sides.
  3. Quarter [or halve if small] the figs, and lay them in concentric circles, pointy side up right up to where the frangipane is. [Don't lay them out to vertically, or the tops might burn, like how I did :( ] Another option of presentation is slicing them horizontally and laying them.
  4. If making a galette, fold the edges in, and pinch to make sure it sticks and stays up. Brush the edges of the pastry with eggwash if wanted, and sprinkle on some sugar. If making a tart, leavee as is. Bake for 45-50 minutes, or until the pastry edges are golden brown.
Fig Tart

Thursday, September 30, 2010

Apple Pie

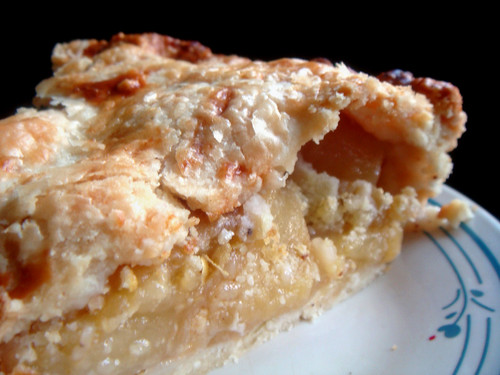
slice of apple pie

I made the most perfect, flaky, delicious pie crust! How about a little cheer for me? Yayy! I'm really happy. While I have made good pie crusts before, they were never perfect, and certainly never this good! It was one of those pies where the crust is as good, or even better than filling. And mind you, that was some tasty filling it had!! I mean, just look at that slice!!


I didn't really follow a recipe with this one. While I follow recipes pretty religiously for cakes, cupcakes and the sort, pies are my creative outlet. I just do what feels right, and only measure so as to be able to provide a recipe to you! But you can trust it, I measure pretty precisely.


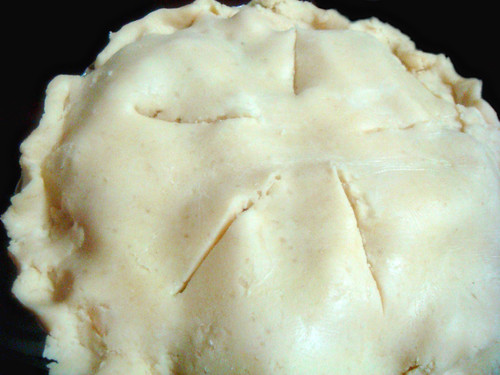
pie crust apple pie

Apple Pie

Recipe by Avanika


For the pastry


375 g flour
225 g [2 sticks/1 cup] butter
1 tsp salt
About a 1/2 of a cup of ice water - use as needed


For the apple filling - 

6 apples [3 pounds]

1/4 cup sugar - my apples weren't very sweet, adjust accordingly, but 1/4 cup will give you pretty good results either way.
1 tbsp lemon juice
2 tsp cinnamon
1 tsp nutmeg


1 egg, optional, for the egg wash

Tools preferable - 
A pie plate 
Pastry blender 
Apple Magician - that's what I call it :P


Instructions - 


For the pastry - 
  1. Chop up your butter into cubes, and flash freeze the flour as well as the cubes. You want everything to be as cold as it can.
  2. Use a food processor /2 knives / a pastry blender / your hands, whatever way you like, and cut the butter into the flour + salt until it resembles coarse breadcrumbs.
  3. As soon as that is done, add in about a 1/4 cup of ice water, and gently mix it together with a fork, adding a tbsp more of water at a time until it just starts coming together.
  4. Divide and shape into two flattened discs, and refrigerate for atleast half an hour. Take one disc out, and roll it into a rough circle between two sheets of cling wrap, measuring against your pie plate, leaving about 2 inches more, for the sides and the overhang. Lay onto the pie plate and put it back into the fridge while you prepare the filling.
For the filling
  1. Peel, core and slice your apples - which is the most tedious part of making this pie, not, ofcourse, if you have those wonderful apple magicians! [hint to mom, I really want one!!].
  2. Toss them together with all remaining ingredients, and pile onto the prepared pastry. You can pile it quite high, because they will reduce once cooked.
Back to the pastry - 
  1. Take the other disc of pastry out of the refrigerator, and roll it out to an approximate similar size. Lay over the apples. With the inch of overhang from the top and bottom, create whatever edge you want, but make sure to press them together well to keep all the lovely apple juices contained. Cut off any excess once you're done. Make a few cuts in the top crust to allow steam to escape. Brush on the egg lightly.
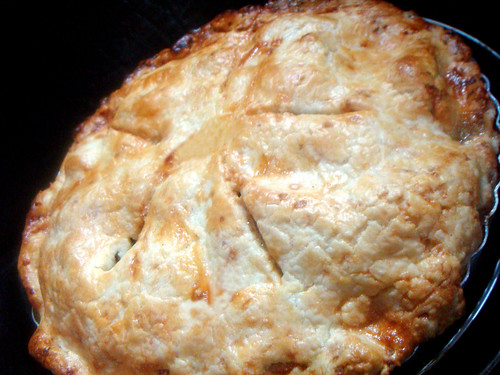
  2. Bake in an oven preheated to 220 C [425 F] for about 30 - 35 minutes, until crust is golden brown.
  3. Marvel at the lovely flaky deliciousness!
apple pie top crust


Friday, July 23, 2010

Peach Pear Plum Galette

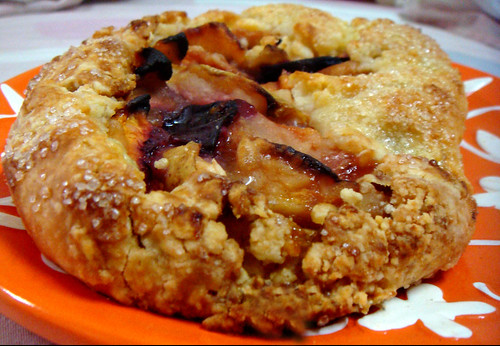
Plum Peach Pear Galette


I don't really get much baking with fruits done, even though I always mean to. After drooling over all kinds of fruit related desserts this whole month, I finally decided to get one done, quick and easy. And nothing defines quick and easy more than a galette. I love it's rustic simplicity. I picked out whatever fruits I had in the fruit box, and went ahead with this dessert. And it was such a hit. Just proves that you don't need to slave for hours over creating a good dessert, sometimes the easiest ones are the best!


And yes, I did manage to burn the tops of those peach slices, but the big one in the middle and towards the end are plums, it looks black, but it actually wasn't. I just wanted a browner color, I hadn't used an egg wash, so I applied one and baked for 10 extra minutes on the next day. I'm pretty particular that way. And it didn't taste at all burnt. :P


I also made some frangipane to go along with it, which, if you have tasted, know how good the galette must have tasted with it. And if you haven't, what's stopping you? It's one of the most delicious things ever!!! The entire tart, apart from the refrigeration time, took less than half an hour to put together, it's that easy. And you can easily skip the frangipane, it's delicious without it too, but there's absolutely no reason to, since it takes 5 minutes, all in the food processor.


Peach Pear Plum Galette


For the crust - 

1 1/2 cup [180 g] flour
3/4 stick [90 g] butter, cubed
1 tsp salt
2 tbsp sugar
Ice cubes, as needed, about 1/4 cup


Instructions - 
  1. Freeze the flour and cubed butter for about 5 minutes, if you have the time.
  2. Using a pastry blender [my preferred way] or a food processor, cut together the butter with the flour, sugar and salt until it resembles coarse breadcumbs. A few small lumps are good.
  3. Drizzle in the ice cold water from the melting ice cubes, a little at a time, incorporating it into the dough, without overworking it. You should stop as soon as the dough can be pressed together, it will look uneven, that's perfect. You do not want it to look homogenous.
  4. Refrigerate for atleast half an hour, while you prepare the other components.

For the Frangipane -
Adapted from Bill's Food via Leite's Culinaria

1/2 stick [70 g, 2 1/2 oz] butter
1/3 cup [75 g] sugar
3/4 cup [150 g] ground almonds, roasted if time permits.
2 egg yolks
1/2 tsp vanilla extract - I used almond instead.


Instructions -
  1. If you don't have ground almonds, grind whole almonds together with the sugar to a fine powder in a food processor, otherwise you might run a risk of turning it into paste.
  2. Pulse together the ground almonds, sugar, butter, yolks and extract in a food processor until mixed well. Refrigerate until chilled.

Fruit topping - 

20 oz fruits - I used 3 peaches, 2 plums and 1 pear
1 tbsp lemon juice


Assembling -
  1. While the dough and frangipane are chilling, prepare your fruits. I don't like the skin of peaches, so I took them off by placing in boiling water for a minute and then peeling them off.
  2. Slice and de-seed whatever fruits you are using, and sprinkle some lemon juice over them. Keep aside.
  3. Remove the dough and the frangipane from the fridge.
  4. Roll the dough out to a rough circle. I made two smaller galettes to make them more individual portioned.
  5. Spread on the frangipane, right upto the edges. I had some leftover.
  6. Leaving about a 2 inch gap on all sides, lay out the slices fruits in whatever manner you choose. Fold the edges on the dough over the fruit. Refrigerate the assembled galette for about 15 minutes [You can skip ths if you are in a hurry].
  7. Preheat the oven to 200 C [390 F]. Crack a small egg in a bowl, lightly beat it, and brush over the dough. [This gives you a nice brown color]. You can also sprinkle some coarse sugar on top.
  8. Bake the galette for 45 minutes, or until dough is golden brown and fruits look caramelized. Serve warm, with a dollop of ice cream if you wish.

Friday, December 25, 2009

Chocolate Pudding Pie for a Great Christmas

merry-christmas

First of all, here's wishing you a MERRY CHRISTMAS, and a Happy New year too! May you have the best times of your life ahead of you! Christmas is one of my favorite holidays - and we have a LOT, here in India - simply because of the whole 'giving' spirit entwined with it. It's such a beautiful feeling. And plus, it brings on the party season!! :)

Slice of chocolate pudding pie

This pie, in all truth, goes completely against the spirit of Christmas. It's one that you will horde for yourself, instead of sharing. But still, it's the pie to make today, for Christmas. /ou can make two, one for the others, one for yourself :P You won't be sorry!

I kind of messed up with the meringue in this pie, so if you are making this, I would recommend using the meringue recipe from the Lemon Meringue Pie instead. So I'm just going ahead and including that recipe in the post.

Chocolate Pudding Pie
Recipe by Me

1 chocolate cookie crust - store-bought or homemade, I used homemade - bake for 15 minutes at 350 F [180 C]
1 recipe chocolate pudding filling [recipe below]
1 recipe meringue [recipe below]

Chocolate pudding pie

For chocolate pudding -

1.5 oz chocolate - I used semi-sweet
1/2 cup [120 g] sugar
5 tbsp [50 g] flour
1 1/2 cup [400 g] milk
1/2 tsp vanilla - I used a vanilla bean
3 yolks
2 tbsp [30 g] butter

Instructions -
  1. In a small bowl, mix the flour and milk together until it becomes homogenous.
  2. In a saucepan, mic together the chocolate, sugar, flour mixture, vanilla and yolks.
  3. Don't worry about the yolks cooking or anything, nothing of the sort will happen.
  4. Take off the heat, and stir in the butter.
  5. Allow to cool, and then pour onto the baked crust.
Meringue topping -
Adapted from Leiths Baking Bible
This is the other meringue recipe that I used in the lemon meringue pie, and it works perfectly.

3 tbsp water
2 tsp cornflour.
3 egg whites
1/3 cup [85 g] caster sugar

Instructions -
  1. Place the water and cornflour in a clean saucepan. Stir over medium heat until the mixture is thick and translucent [same as above]
  2. Whisk the egg whites until they form stiff peaks. Whisk in the sugar, gradually.
  3. Whisk in the cornflour gel until incorporated.
  4. Add this meringue on top of the baked lemon cream filling, using a knife to make peaks.
  5. Sprinkle a little extra caster sugar. [Do not use powdered sugar, trust me!!!!]
  6. Put the pie back into the oven, and bake for about 15 minutes, until the topping is light brown.
  7. Allow to cool before slicing and serving.
  8. You're done!!! :)
 Here's the picture of the screwed up meringue, which came off very easily from the pie, but I would suggest retaining for a good balance of tastes and textures.

Sliced chocolate pudding pie

P.S - This is a scheduled post, I'm off vacationing in Europe at this time. See you in about 10 days!!!!

Tuesday, December 8, 2009

Banoffe Pie... My first time with Dulce De Leche

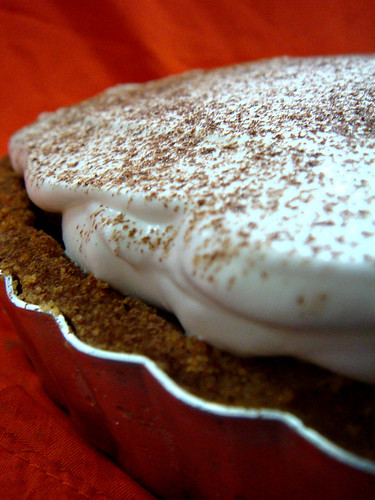
Banoffee Pie
I've heard soo many good things about Dulce De Leche [DDL], but was always intimidated making it because of the exploding cans possibility. And since we don't get readymade DDL here, I had never even tried it.

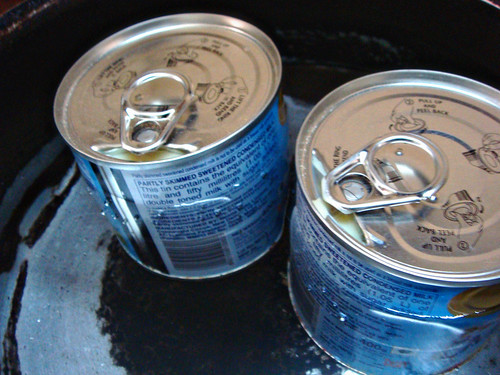
Then one day, when I was feeling particularly reckless, with the 'so what if it explodes, I'll only be in the hospital for a while' thought in me, I decided to go for it. I looked around for a recipe that uses DDL as one of its main ingredients, and came across the Banoffee pie. Perfect!!

I first went and made 2 cans of DDL, and faced my fears. Thank god I did! It was soo worth it. I urge everyone else to try it out as well, there's nothing to worry about as long as you keep topping the pan up with water! I now always have atleast one can of DDL ready, and I eat it right off a spoon on most occasions! :)
Making Dulce de Leche

The pie was delicious, it really highlighted the flavor of the DDL, and it's combination with the bananas was perfect! Next time, I'll just reduce the amount of whipped cream I put on top, since it made the pie VERY rich!

I didn't really follow a recipe for this, but here it is anyway -

Banoffee Pie
Recipe by Avanika

1 graham cracker crust [store bought, or homemade]
2 cans Dulce De Leche - homemade or store-bought
2 bananas
1 cup whipped cream - vary this as per your taste. You could even omit this if you want.
A few tablespoons cocoa powder, for dusting on top.


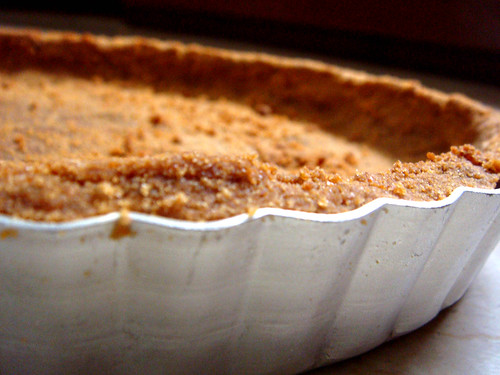
Graham Cracker Crust ready for Banoffee


I'm providing a recipe for a homemade graham cracker crust, for those of you going the homemade way -

1 1/2 cup [About 24] processed graham crackers - I used digestive biscuits.
1/4 cup sugar
1/2 tsp salt
1/2 tsp cinnamon powder - optional, but I still urge you to add it.
3/4 stick [85 g /6 tbsp] butter, melted

Instructions -
  1. Grease an 8 inch pie plate. Preheat oven to 180 C [350 F]
  2. Combine the ground biscuits, sugar, salt, cinnamon in a bowl, and mix thouroughly.
  3. Add the melted butter, then line the pie-plate liberally.
  4. Bake for 10 minutes, cool on a rack.

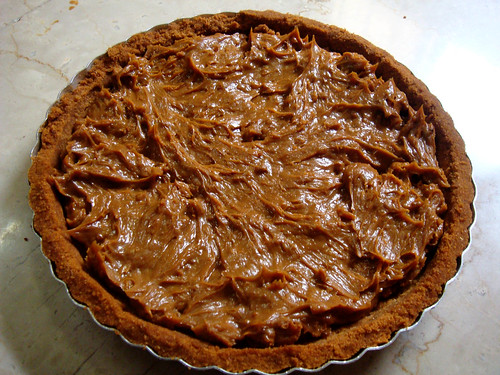
Yummy Dulce De Leche waiting for Banoffee


For the pie -
  1. Pour both the cans of dulce de leche on the cooled pie crust. If you made homemade DDL, make sure to let it cool completely.
  2. Slice the bananas, and line on top of the DDL.
  3. Now add the whipped cream on top, using a spatula. Smoothen it out, and dust with cocoa powder for the traditional look.
  4. Slice, and serve. Refrigerate the rest.

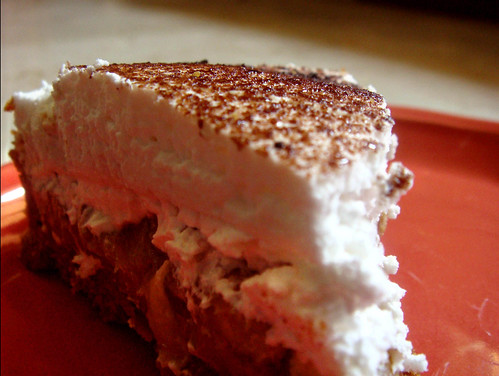
Slice of Banoffee

Do try this, and let me know how you like it. Doesn't it look totally sinful?

Monday, August 24, 2009

Lemon Meringue Pie!!

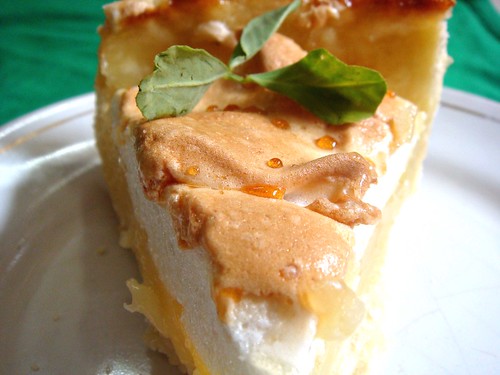
Want a slice of Lemon Meringue Pie

After being sick for so long, I really missed being able to bake!! Only yesterday was I able to gather enough energy to make something! And I chose… PIE!! Pie crust has always been a bit of a challenge for me, though they turn out pretty well, it always makes me worry a lot!! But, this time, I had the added advantage of using a pastry blender, from the amazing haul my parents recently got me! And I must say, it is probably the single best invention ever! It made making pie soo easy!! All of you that use a food processor, please go and try it this way, you’ll never look back!! Here's the one I'd LOVE to own, if only it were available here, and I recommend you get, if you're looking to buy one!
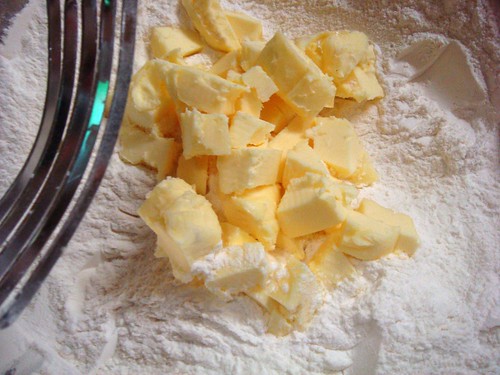
After deciding on making pie, I thought I'd challenge myself some more, and try and make a lemon meringue pie! I had tried making this some 7-8 years ago, when I was 11, and failed miserably!! Somehow, since then, lemon meringue pie has always been a kind of a benchmark, a goal! And I finally achieved it! I am so proud of myself!! It wasn't perfect, but I knew the reason for each mistake, and know now what to do to get it perfect :) :)

And it tasted sooo good! My favorite comment was from my mom, who said - it's like eating a cloud :) :) Yayy! The tartness of the lemon cream was perfectly balanced with the sweetness of the meringue!! I'm going to make this again, without all the mistakes!!

I used a recipe from my favorite book, Leiths Baking Bible. The crust came out beautifully, this is going to be my go-to recipe from now on!

Lemon Meringue Pie
1 recipe rich shortcrust pastry [see below]
1 recipe lemon cream filling [see below]
1 recipe meringue [see below]
A little extra caster sugar [to finish]

Rich Shortcrust Pastry
Adapted from Leiths Baking Bible
Buy from flipkart.com

1 cup less 1 tbsp [6 oz,/ 170 g] flour
1 tsp salt
3/4 stick [3 oz/85 g] butter
1 egg yolk
2 tbsp ice water


Instructions -
  1. In a large bowl, sift together the flour and the salt.
  2. Cut butter into inch-sized cubes, then add to the flour.
  3. Using a pastry blender, cut the butter into the flour until it resembles coarse breadcrumbs. Don't worry about it coming together yet.
  4. Beat together the ice water and the yolk [I just added a few cubes of ice to the yolk]
  5. Add this as needed to the butter mixture a tablespoon at a time, until it starts to come together.
  6. Refrigerate for atleast 20 mins before rolling out..
  7. Blind bake at 350 F [180 C] until brown.


Cutting the butter for pie crust


Lemon Cream Filling -
Adapted from Leiths Baking Bible


4 tbsp [30 g] cornflour
1 cup [225 g] caster sugar
1 cup + 3 tbsp [190 ml] water
3 egg yolks
1 egg, beaten
Zest of 2 large, unwaxed lemons,
115 ml lemon juice [About 4 lemons] [Indian lemons are much more tart, and much smaller, but the juice of 4 lemons is just perfect, which is about 60 ml]

Instructions -
  1. Place the cornflour, sugar and water in a saucepan. Stir over medium heat, until the mixture boils, and it turns thick and translucent [like a gel]
  2. Whisk in the egg yolks and beaten egg into the hot mixture, whisking constantly to avoid cooking of the egg.
  3. Pass the mixture through a sieve to get rid of all the egg threads.
  4. Add the lemon juice and zest.
  5. Add this hot mixture to the pre-baked crust, and bake for 10 minutes at 350 F [180 C].

Meringue topping -
Adapted from Leiths Baking Bible

3 tbsp water
2 tsp cornflour.
3 egg whites
1/3 cup [85 g] caster sugar

Instructions -
  1. Place the water and cornflour in a clean saucepan. Stir over medium heat until the mixture is thick and translucent [same as above]
  2. Whisk the egg whites until they form stiff peaks. Whisk in the sugar, gradually.
  3. Whisk in the cornflour gel until incorporated.
  4. Add this meringue on top of the baked lemon cream filling, using a knife to make peaks.
  5. Sprinkle a little extra caster sugar. [Do not use powdered sugar, trust me!!!!]
  6. Put the pie back into the oven, and bake for about 15 minutes, until the topping is light brown.
  7. Allow to cool before slicing and serving.
  8. You're done!!! :)


I was surprised at how easy making this pie was! It is a little involved, and you have to make sure the filling and topping are ready on time, to match with the bake times. But it is pretty easy! I did make a lot of mistakes, the major one being I couldn't find my pie plate, so I baked it in a cake pan, and that's why the crust pulled away a little. And I was out of caster sugar, so I thought adding powdered sugar on top would serve the same purpose! Surprise, surprise! It doesn't :P :P Those little beads of water on the meringue were caused by it!

Inspite of these little mistakes, it turned out pretty well, and tastes amazing!!! You must try this! If I can make it, anybody can!! I am seriously lacking in the pie crust aspect!


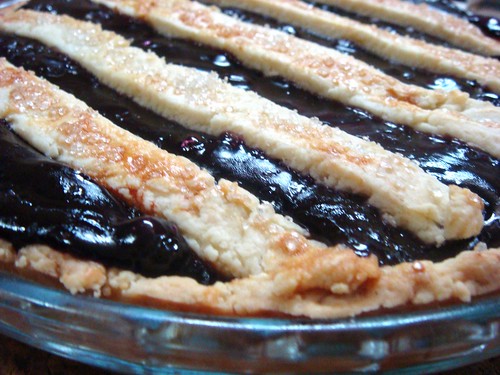
Blueberry Pie

I also had some blueberry pie filling my parents got me, that I had to use! Since I didn't make it from scratch, I won't talk much about it, but it looked amazing!! It tasted pretty okay, nothing to write home about! As you can see, I was going for the lattice crust, but I gave up halfway, since I was out of patience!!
Related Posts with Thumbnails