Saturday, August 29, 2009

Decorating Course…. Part 8

This is the last of my posts about the decorating course for atleast 2 months, when I get a chance to make up the missed classes with the next batch! Luckily, I had attended this session before falling sick! It was quite an easy session, with roses and sugar bells!


DSC03431 2

We started off with making the buds out of gumpaste, and leaving them to dry for a while. Making the buds was actually quite easy! They then showed us how to make the petals, and how to place them on the bud. I was not too pleased with the end results, because I’ve seen way better roses online [see tonedna on YT], but maybe that’s because of the primitive tools we use!! A spoon?? Come on!!! It’s shocking :P :P

Anyway, here’s what it was supposed to look -


DSC03432 2

Versus how it looked. I had problems with tearing, I couldn’t bring myself to use the damn spoon properly!


DSC03433 2

I’m very busy with college presentations at the moment, but I plan on practicing and perfecting these flowers after that [maybe 2 weeks], and maybe then I can get over the fact that we use a spoon to make a rose!!!!

One very interesting thing we learnt in this session was how to make baked sugar bells. I don’t have any pictures, since all our curious hands broke it, but it’s really quite easy! We just filled a mould with castor sugar, and then baked it in the oven. I plan on using this technique using a lot of other moulds too!! :)

I hope to continue this session of posts soon! Till then, you can always read up on the older ones -

Part 1, Part 2, Part 3, Part 4, Part 5, Part 6, Part 7, Part 9, Part 10, Part 11

Monday, August 24, 2009

Lemon Meringue Pie!!

Want a slice of Lemon Meringue Pie

After being sick for so long, I really missed being able to bake!! Only yesterday was I able to gather enough energy to make something! And I chose… PIE!! Pie crust has always been a bit of a challenge for me, though they turn out pretty well, it always makes me worry a lot!! But, this time, I had the added advantage of using a pastry blender, from the amazing haul my parents recently got me! And I must say, it is probably the single best invention ever! It made making pie soo easy!! All of you that use a food processor, please go and try it this way, you’ll never look back!! Here's the one I'd LOVE to own, if only it were available here, and I recommend you get, if you're looking to buy one!

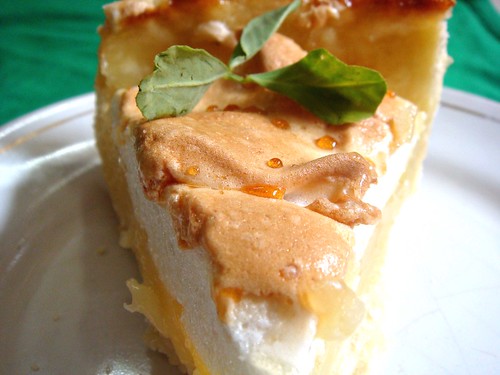
After deciding on making pie, I thought I'd challenge myself some more, and try and make a lemon meringue pie! I had tried making this some 7-8 years ago, when I was 11, and failed miserably!! Somehow, since then, lemon meringue pie has always been a kind of a benchmark, a goal! And I finally achieved it! I am so proud of myself!! It wasn't perfect, but I knew the reason for each mistake, and know now what to do to get it perfect :) :)

And it tasted sooo good! My favorite comment was from my mom, who said - it's like eating a cloud :) :) Yayy! The tartness of the lemon cream was perfectly balanced with the sweetness of the meringue!! I'm going to make this again, without all the mistakes!!

I used a recipe from my favorite book, Leiths Baking Bible. The crust came out beautifully, this is going to be my go-to recipe from now on!

Lemon Meringue Pie
1 recipe rich shortcrust pastry [see below]
1 recipe lemon cream filling [see below]
1 recipe meringue [see below]
A little extra caster sugar [to finish]

Rich Shortcrust Pastry
Adapted from Leiths Baking Bible
Buy from flipkart.com

1 cup less 1 tbsp [6 oz,/ 170 g] flour
1 tsp salt
3/4 stick [3 oz/85 g] butter
1 egg yolk
2 tbsp ice water


Instructions -
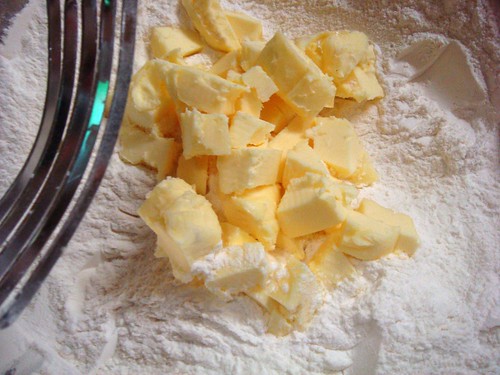
  1. In a large bowl, sift together the flour and the salt.
  2. Cut butter into inch-sized cubes, then add to the flour.
  3. Using a pastry blender, cut the butter into the flour until it resembles coarse breadcrumbs. Don't worry about it coming together yet.
  4. Beat together the ice water and the yolk [I just added a few cubes of ice to the yolk]
  5. Add this as needed to the butter mixture a tablespoon at a time, until it starts to come together.
  6. Refrigerate for atleast 20 mins before rolling out..
  7. Blind bake at 350 F [180 C] until brown.


Cutting the butter for pie crust


Lemon Cream Filling -
Adapted from Leiths Baking Bible


4 tbsp [30 g] cornflour
1 cup [225 g] caster sugar
1 cup + 3 tbsp [190 ml] water
3 egg yolks
1 egg, beaten
Zest of 2 large, unwaxed lemons,
115 ml lemon juice [About 4 lemons] [Indian lemons are much more tart, and much smaller, but the juice of 4 lemons is just perfect, which is about 60 ml]

Instructions -
  1. Place the cornflour, sugar and water in a saucepan. Stir over medium heat, until the mixture boils, and it turns thick and translucent [like a gel]
  2. Whisk in the egg yolks and beaten egg into the hot mixture, whisking constantly to avoid cooking of the egg.
  3. Pass the mixture through a sieve to get rid of all the egg threads.
  4. Add the lemon juice and zest.
  5. Add this hot mixture to the pre-baked crust, and bake for 10 minutes at 350 F [180 C].

Meringue topping -
Adapted from Leiths Baking Bible

3 tbsp water
2 tsp cornflour.
3 egg whites
1/3 cup [85 g] caster sugar

Instructions -
  1. Place the water and cornflour in a clean saucepan. Stir over medium heat until the mixture is thick and translucent [same as above]
  2. Whisk the egg whites until they form stiff peaks. Whisk in the sugar, gradually.
  3. Whisk in the cornflour gel until incorporated.
  4. Add this meringue on top of the baked lemon cream filling, using a knife to make peaks.
  5. Sprinkle a little extra caster sugar. [Do not use powdered sugar, trust me!!!!]
  6. Put the pie back into the oven, and bake for about 15 minutes, until the topping is light brown.
  7. Allow to cool before slicing and serving.
  8. You're done!!! :)


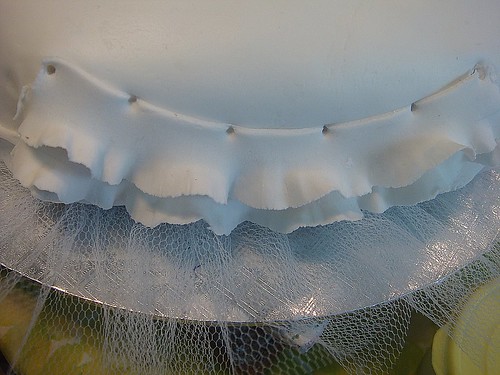
I was surprised at how easy making this pie was! It is a little involved, and you have to make sure the filling and topping are ready on time, to match with the bake times. But it is pretty easy! I did make a lot of mistakes, the major one being I couldn't find my pie plate, so I baked it in a cake pan, and that's why the crust pulled away a little. And I was out of caster sugar, so I thought adding powdered sugar on top would serve the same purpose! Surprise, surprise! It doesn't :P :P Those little beads of water on the meringue were caused by it!

Inspite of these little mistakes, it turned out pretty well, and tastes amazing!!! You must try this! If I can make it, anybody can!! I am seriously lacking in the pie crust aspect!


Blueberry Pie

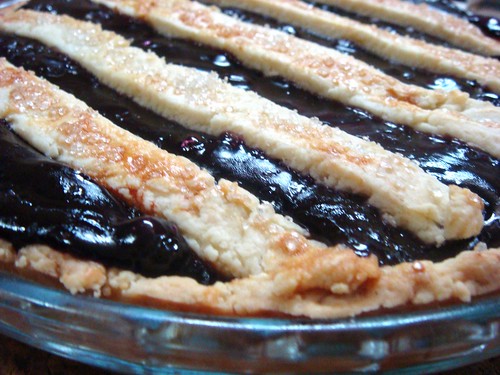
I also had some blueberry pie filling my parents got me, that I had to use! Since I didn't make it from scratch, I won't talk much about it, but it looked amazing!! It tasted pretty okay, nothing to write home about! As you can see, I was going for the lattice crust, but I gave up halfway, since I was out of patience!!

Wednesday, August 19, 2009

Decorating Course... Part 7

I'm sorry I've been away for so long! I've really missed blogging! Unfortunately, I had malaria, and then some complications in the spleen and what not! Been unwell since the past 10 days or so, I'm finally recovered enough!! The worst part of being sick, aside from not being able to come online, and not being able to bake anything to make me feel better [ :( ] , was that I had to miss class! I missed 3 whole sessions :O :O!!! I still haven't figured out when I'm going to make up for the lost sessions, but luckily it gives me time to let you all catch up with the classes, since there was forming quite a backlog!!

DSC03479

First we learnt the more elaborate lace and filigree work, such as the ones above, since we'd learnt the easier ones at the end of the basic course. That's the template of a number of filigree pieces, we pipe on plastic for ease of removing!

DSC03480

These are the templates for the lace pieces, that we pipe on individual lace cut-outs, and use as cake toppers, or the filigree pieces on sides as you can see here. This was a short part of the class, just to make sure we keep in touch with our piping! I made millions of the pieces, but unfortunately, they got spoilt on my way home, because of the rain! So I only have pictures of the templates!


Piping

Also, they made us practice those since we had to learn how to do 'curtain work' as they call it, I'm pretty sure it's called something else otherwise, I simply can't remember what!! Anybody who could tell me would be a great help :) We learnt cross way, as well as straight, which I like much better!! We have to create a sort of 'bridge' to hold the piping, and to take it away from the cake.

Bridge for RI


Creating the frills

Last, we learnt how to make gumpaste frills, that are applied along the sides of a cake! They really look quite elegant, and I'm pretty sure would look awesome with a touch of color, and ofcourse, piping on top!

Frills on cake

This session was one of my favorites, with a nice balance of piping, as well as gumpaste work. And I'd always wondered and loved the 'curtain work', so I was glad I learnt it!! Can't wait to tell about next week's session though! Super-interesting!!

Read more on this course - Part 1, Part 2, Part 3, Part 4, Part 5, Part 6, Part 8, Part 9, Part 10, Part 11

Monday, August 3, 2009

Jam Squares

DSC02128 - Copy 2

Wooh! I'm finally back, after going through some major laptop issues!! Haven't been online for days, will catch up on your blogs tomorrow!! :$ But the good thing about a spoilt laptop is, I ve lotss of time to bake :) I made so many things!! One of those are these delicious jam squares, to use up all the excess jam I were leftover from these cookies!

And boy, was I glad I made them! So easy, and yet so delicious! My favorite part was where the jam oozed out, and caramelised, it tasted soo good!! Really mouth-watering! The squares were over before I knew it, with my diet-conscious friends eating it up without a care in the world :P! Try these when you don't really feel like baking anything elaborate, and are looking for a quick fix for a craving! Though ofcourse, don't go by me, you can totally make this for company too!!!

Jam squares
Adapted from Allrecipes

6 oz [170 g] raspberry jam - Use whatever you have, I used about 4 oz. of raspberry, and 2 oz. of pineapple! I preferred the pineapple!
1 c [120 g] chopped walnuts
2 1/4 [285 g] flour
1 c [245 g] sugar
1 c [225 g / 2 sticks] butter - I used 3/4 cup, or 1 and 1/2 stick


INSTRUCTIONS -

  1. Preheat oven to 180 C [350 F]. Grease a 9x11 pan, or divide into 2 smaller pans for different fillings.
  2. Let butter come to room temperature, and then combine together all ingredients except the jam.
  3. Press 3/4 of the mixture into the pan, so that it forms a kind of crust.
  4. This is where you can go crazy. Add whatever jam, filling etc you want to use, just make sure to leave an 1/2 inch border along the sides.
  5. Sprinkle the rest of the mixture on top.
  6. Bake for about 40 minutes, or until the top is golden brown.
  7. Cool, and then cut into bars!


DSC02127 2

Aren't they tempting you? I'm off to eat what's left of them!!
Related Posts with Thumbnails