Monday, July 27, 2009

Decorating Course... Part 6

Here I am again.... with one more class to talk about! It's just getting a little tiresome, and though I'm still enjoying class, I'm always wondering how to make this sound interesting to you, since all we've been doing for quite a while is flowers, flowers, flowers. So I figured, let's keep it short and sweet this time -

DSC03175 2

The azalea, I think. Didn't have a good picture of the one they made, sorry! Mine looks nothing like it :P

We also learnt how to make petal dust, since finding it here can be quite a hassle! And its so easy too!! I'd make it even if it were available everywhere!! :P

DSC03187 2

Carnations - One of my favorite flowers, glad I can make them well! :)

DSC03184 2

DSC03185 2

Random fillers!

Next week, for a change, and so that we keep in touch with our icing, we learn, in detail lace and filigree pieces! Should be fun :D

P.S - I promise to practice more, and show my improved flowers to you soon!!

Read more on this course - Part 1, Part 2, Part 3, Part 4, Part 5, Part 7, Part 8, Part 9, Part 10, Part 11

Wednesday, July 22, 2009

Oatmeal Raisin Cookies

DSC02933 2
I never imagined that the classes I'm taking would take over my life in such a way. A few weekends ago, I was all set to go on a trip to the hometown, where 100's of cousins were waiting. BUT it was clashing with class!! And would you believe it, I - who usually miss class like nobody's business - didn't go along with the family for the decorating course!!! THAT'S how much I love it :P

But to compensate not going, I made some stuff to send there, sturdy things, that would last for about a week's travel. I had my first experience with baking and decorating sugar cookies, and I must say, its HARD work! I am in serious AWE of people who do this as their career!!

Since I was sugar cookied out by the end of the 3rd day [that's right, I took 3 days], I made some simple cookies to go along with them! I had made these cookies a longgg time ago, so I simply got out my old recipe book, and whipped them up in less than an hour's time!


DSC02802 2

Oatmeal Raisin Cookies

3/4 cup [1 1/2 stick / 170 g] butter
1/2 cup [100 g] granulated sugar
3/4 cup [150 g] light brown sugar
2 eggs
1 tsp vanilla
1 1/4 cup flour
1 tsp baking soda
3/4 tsp cinnamon
1/2 tsp salt - I usually omit this, since I use salted butter
2 1/2 cups [250 g] rolled oats - I uses quick cooking
1 cup [150 g] raisins

INSTRUCTIONS -

  1. Preheat oven to 180 C [350 F]
  2. In a large bowl, cream the butter and sugars until pale and fluffy.
  3. Add eggs and vanilla, and beat it all together.
  4. In a medium bowl, sift together the flour, baking soda, cinnamon, and salt.
  5. Add to the butter mixture.
  6. Add in the oats, and raisins, and mix till incorporated.
  7. Drop onto greased cookie sheets and bake for about 10 minutes, until golden brown [Mine took exactly 9 minutes]
  8. Cool on a cooling rack.

These cookies are FABULOUS! And soo easy to make. I almost always have a few frozen dough balls of this ready to be baked in the freezer. They satisfy all cravings. Just lean in closer to the monitor, a little more, and you'll be able to taste these. And if that doesn't work for you, then go right away to the kitchen, and bake these! It will barely take 10 minutes! You'll thank me later :P


DSC02923 2

Saturday, July 18, 2009

Decorating Course... Part 5

After last week's cake, I was very excited, since that went so well, and we were to learn gumpaste. I was thrilled, that was one of the main reasons I'd joined class! We learnt a few flowers, basic easy ones, but it was super fun!

The class began with us learning to make gumpaste, which is actually really similiar to fondant, except there's no egg white! Since we'd all already made fondant, this was actually quite easy for us! The instructors always teach us to to judge the correct consistency, rather than giving an estimate figure! As I learnt, it must be firm, but still moist enough to be rolled, and used. They also provided with a few tools for decoration, and petal cutters, that we needed to form the flowers.

They first they had us to, to get a little used to gumpaste, were simple plunger flowers. I loved how easy they were, and made too many :P Unfortunately, we don't get good quality plungers here, I'm going to have to wait for someone who's coming down here!

DSC03165 2

At the end of the class, after they had dried, we made swags/swirls? I forgot what it's called, but were made these using them -

DSC03237 2

As you can see, a LOT of the petals are broken. I thought I had clicked a picture of it, but I couldn't find it anywhere. So I clicked a picture today, a week later! I didn't bother with drying it up, since I knew I wouldn't have much use of it! luckily I hadn't thrown it out!

The first actual flower we learnt was the lily. The rains actually work in our favour for once, since it gives us much longer to work with the gumpaste, before it gets hard! However, after drying, the tiny bits tend to break off, since they get a little moist, as you can see in the picture below -

DSC03167 2

That's what the flower we make is supposed to look like, however we will learn airbrushing and coloring in a later class. They demonstrated how to roll the gumpaste out, to what thickness, etc. and then we made our flowers -

DSC03163 2

That was my first flower ever, so I'm pretty pleased with the results. Obviously the center had to covered, and it needs a lott of work. I actually practiced a lot over the week, and made pretty good lilies [no idea what kind these are. I have practically zero knowledge of flowers]. Unfortunately, I underestimated the amount of time needed to dry them in the pouring weather, and they soon lost shape :( It's the practice that counts doesn't it :P


Next up, the hibiscus. I lovee this flower, in real life. My gumpaste ones leave a lot to be desired :P. Here a picture of they are supposed to look, [they didn't have a colored one around that I could click ]-

DSC03164 2

Versus how my first one looked -

DSC03168 2

LOL! You can clearly see which was my first petal, and how by the last one, I started getting a hand of the ruffling. I didn't make actual flowers later in the week, for practice, I just did a LOT of ruffling, which they said we needed to learn for next week's class. Unfortunately, as I said before, no pictures :(

Read more on this course -Part 1, Part 2, Part 3, Part 4, Part 6, Part 7, Part 8, Part 9, Part 10, Part 11

Saturday, July 11, 2009

Blueberry Muffins.... How I Love Thee!

DSC03154 2

Strawberries, blackberries, mulberries, I love them all! Unfortunately, the one berry I hadn't tasted yet was blueberries!! And hearing how everyone was always raving about them only intensified the need!! Well, guess what? I finally tasted fresh ones after years and years of longing! After last week's post about the awesome stuff my parents got me, the one thing I failed to show were blueberries! And boy, was I surprised! They were even better than I imagined. So luscious, so ripe, so.... just WOW! I would have eaten them all up, but I just had to make something with them too, it would be a waste if I didn't! It's going to be a long while before I get my hands on any fresh ones again, and there was this particular recipe I've had my eye on since forever! The name itself is enticing!

And thank god I did! The muffins were soo good! Velvety satiny perfection! I wasn't a huge fan of the crumb topping that was a part of the recipe, that I tried since the recipe was so well reviewed! I'm also giving my favorite crumb topping recipe below, I'd suggest you try it with that instead, though you can always try the original one too. I'd love to hear what you prefer with it.

DSC03144 2

To Die For Blueberry Muffins
Adapted from allrecipes

1 1/2 cups all-purpose flour
3/4 cup white sugar
1/2 teaspoon salt
2 teaspoons baking powder
1/3 cup vegetable oil
1 egg
1/3 cup milk
1 cup fresh blueberries

For the crumb topping [the one on the muffins]
1/2 cup white sugar
1/3 cup all-purpose flour
1/4 cup butter, cubed [I used about 1/2, it wouldn't hold other
1 1/2 teaspoons ground cinnamon


For the streusel topping I usually use, and would prefer with these:
2 tablespoons flour
3 tablespoons rolled oats
1/4 cup packed brown sugar
1/2 cup chopped toasted pecans [I usually use walnuts]
2 tablespoons unsalted butter, softened

Picnik collage

For the muffins :
  1. Preheat oven to 350 F (180 C). Grease muffin pan or line with muffin liners.
  2. In a large bowl, sift together the flour, sugar, salt and baking powder.
  3. Place vegetable oil into a 1 cup measuring cup; add the egg and enough milk to fill the cup.
  4. Mix this with flour mixture. Fold in blueberries.
  5. Fill muffin cups right to the top, and sprinkle with crumb topping mixture.
For the crumb topping:
  1. Mix together sugar, flour, butter, and cinnamon.
  2. Mix with fork, and sprinkle over muffins before baking.


For the streusel topping:
  1. In a medium bowl, stir together the flour, oats, brown sugar, and pecans.
  2. Using a fork, cut in butter until well combined and mixture begins to hold together a bit.
Bake for 20 to 25 minutes in the preheated oven, or until done.

I loved these muffins. I'm going to use the muffin recipe as a base for other fruits too, it was perfect!! Trust me, try these NOW! They deserve the YUMSILICIOUS title!!
DSC03157 2

Sunday, July 5, 2009

Decorating course... Part 4

DSC03112 2

So last Sunday was the end of the basic course as they call it. It was a kind of test, to assess how much we had learnt in the past 3 weeks. We had to bake a cake, make fondant and marzipan, and any flowers we wanted to use, from home! All assembling an piping had to be done in class.

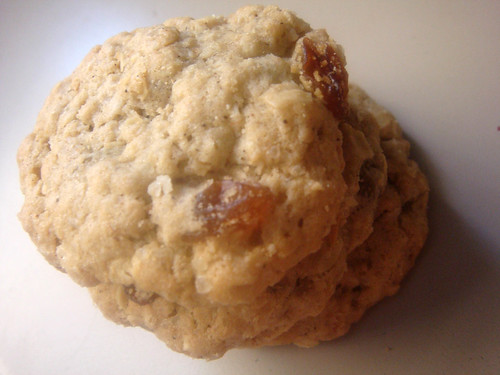
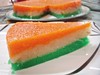
For the cake, we had to use one of 2 recipes they had given. I used one for a basic vanilla cashew cake, that I divided into chocolate and vanilla. It tasted real good, and it was a little less sweet to make up for the super-sweet fondant, which I absolutely hated when I tried it. But surprisingly, it didnt taste so bad with the cake. It tasted pretty good, in fact!!!!! Can you believe it? I'm still shocked!!


DSC03151 2


I made the marzipan and fondant at in the week before the class, and it was pretty easy. Ofcourse, the rains were a big problem while making fondant, but a little extra sugar made it perfectt!!

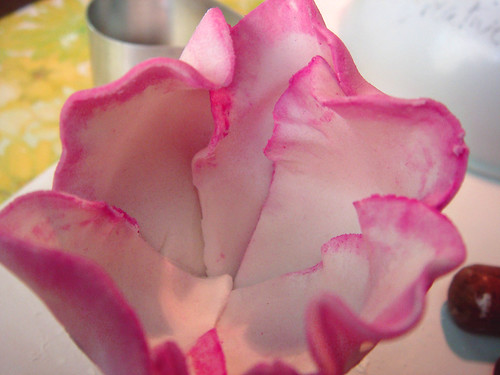
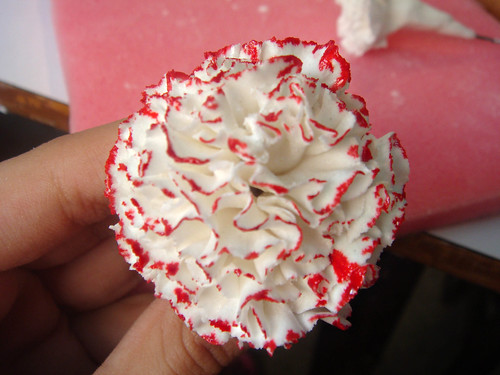
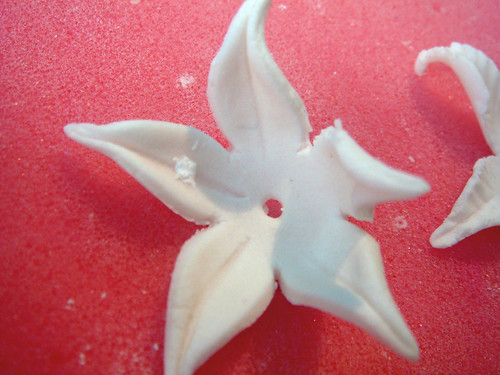
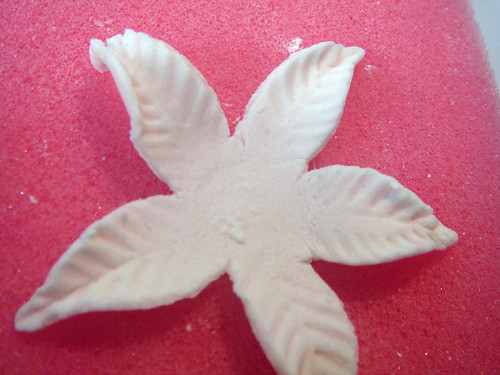
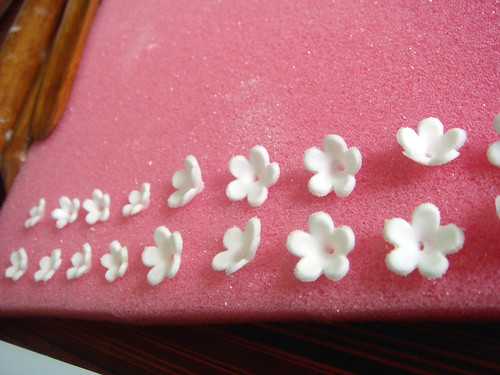
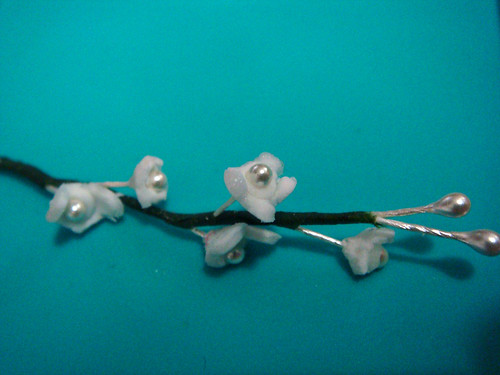
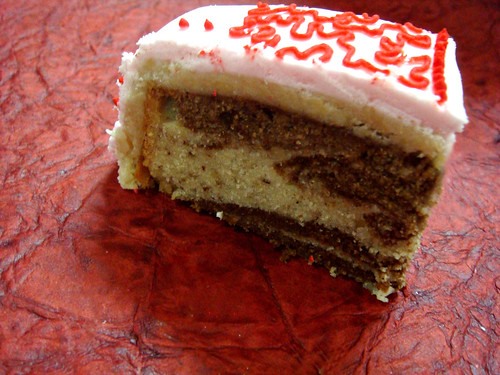
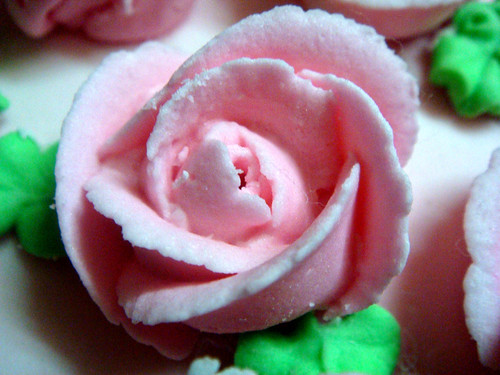
For flowers, I made roses, leaves, and drop flowers. The roses were intended to be blood red, but they came out pink :( Since this was the first time I was actually dealing with colors, I didn't let this bother me too much. As long as the technique was right, I was happy. The leaves were also a bit too pastel green, but I didn't have the right colors!! And the drop flowers, well they were a nice mauve-ish color, but somehow, over a few days, their color got completely ruined, and I ended up not using them. I was pretty disappointed.

DSC03118 2

But in class, they totally cheered me up, and I started to cover the cake with marzipan and fondant. I apologise for not having any in-process pictures, but my camera was with my parents, who went out of town for a business meeting. However, they got me a lot of awesome stuff to compensate for it, that's coming up later!!

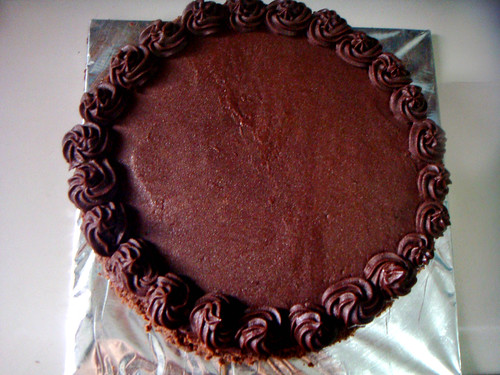
I began with piping after that, and they made the most amazing looking red icing ever. I think I've done a pretty good job with it, even better than the little part one of the instructors [who isn't too good with piping] did. The piping on the bottom was done by him, and the one towards the top of the cake was done by me, as you can see -

DSC03114 2

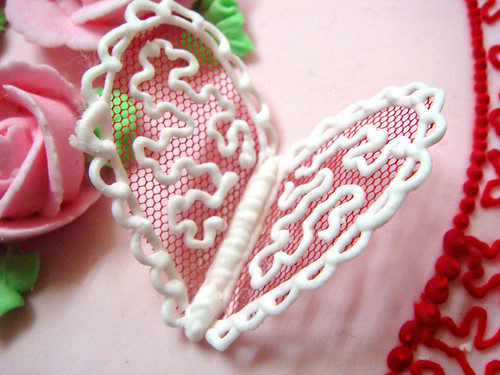
They had mentioned they would teach us filigree and lace work after the decorating was done, and told us to leave place for it on our cakes, if we wanted to. Going with the shape of the cake, I chose a filigree heart, that I think looks rather pretty!! What do you think?

DSC03115 2

So that was my cake. I had a number of problems with it, and by the time I got my camera back, a few of those things on the sides had broken off. Not everything was exactly as I wanted it, some of the instructors input was opposing my idea. But still, it was my first fondant cake, and second decorated cake ever, so I'm realllly pleased :D :D

DSC03124 2

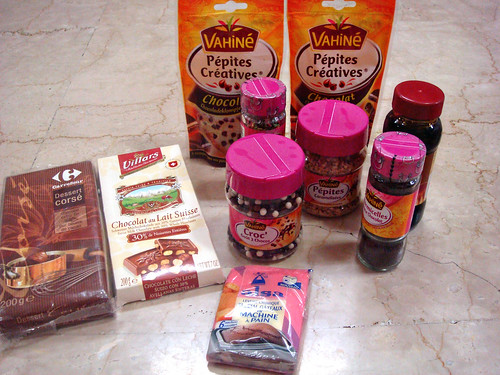
And here's the haul which my parents got, for which I was glad to give my camera!! I know it may not seem like much, but we don't get much stuff here in India, so I was ecstatic. I was happier seeing these, than the clothes they bought for me :O :O :O There's a lot of other stuff, like chocolates, and loads and loads of brown sugar, that is still to come to me, since they were carrying more than the allowed weight. :D :D

Mom also bought 
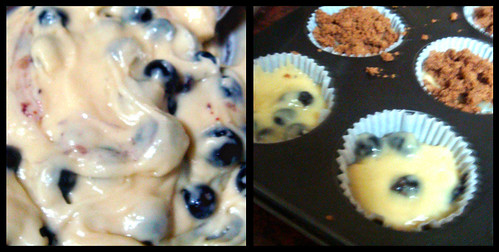
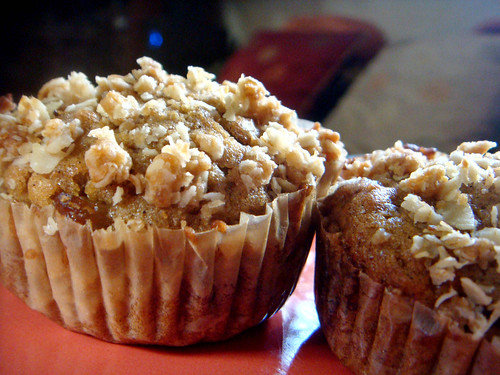
fresh blueberries, something that I hadn't ever tasted before, in my entire life. I ate a few, and made muffins with the rest, which were soooo good! I'm craving more blueberries right now!!

DSC03127 2

And also, a few weeks ago, my cousin sister went to France, and bought chocolates, and this stuff for baking, though I only asked her to get sprinkles. Isn't she the sweetest?

DSC03133 2

Also, could anyone who can read French pleasee tell me what this says? Mom told me it was some pudding thing, but I need to know exactly - Thanks!!

DSC03134 2

So what do you say? Don't I have the bestesttt family EVER?? :D [Can you tell that I'm super-excited? :P]

Read more on this course - Part 1, Part 2, Part 3, Part 5, Part 6, Part 7, Part 8, Part 9, Part 10, Part 11

Wednesday, July 1, 2009

Crunchy Chocolate Bars

DSC02519 2

I just bought a new book, Leiths Baking Bible at my local bookstore. I was pretty excited, since getting good cookbooks over here is quite a task!! I had to try out the book, and the crunchy chocolate bars just popped out to me! They seemed perfect, and super-easy!! And plus, it would use up the last of the super-huge box of oats I bought to make my favorite chocolate chip cookies!

The bars tasted soo good. I halved the recipe, and wished I hadn't. They got over within hours!!! And the best part was, the recipe took like just 5 minutes to prepare, before going into the oven!! It looked so good going into the oven -


DSC02514 2


Crunchy Chocolate Bars
Adapted from Leiths Baking Bible
Buy from flipkart.com

2 sticks [225 g, 8 oz.] butter
3/4 cup [140 g, 5 oz.] light brown sugar
1 cup [140 g, 5 oz.] self-raising flour - I substituted using 1 c A.P flour + 1 tsp. b. powder + 1/4 tsp b. soda
1 1/2 tbsp cocoa powder
3/4 cup [85 g, 3 oz] porridge oats
3/4 cup [85 g, 3 oz] crushed corn flakes

To finish -
140 g, 5 oz milk chocolate, chopped into small pieces


Instructions -
  1. Preheat the oven to 350 F [180 C]. Grease and line a 11 x 7 inch tin lined with parchment. [ I didn't use]
  2. In a large bowl, cream the butter and sugar together, until pale and fluffy.
  3. In a small bowl, sift together the flour and cocoa.
  4. Add to the butter mixture.
  5. Then add the oats and corn flakes. Mix well.
  6. The batter will be very dry.
  7. Press into the prepared tin [a potato masher will help], and bake for about 20 mins.
  8. The mixture should still be a little soft when in the oven.
  9. Mark into 16 bars while still hot, then allow to cool completely in the tin.
  10. Melt the chocolate in a using a bain marie [I melted in the microwave]
  11. Spread over the bars. When the chocolate has set, cut the bars into pieces.

DSC02564 2
Related Posts with Thumbnails