Sunday, May 31, 2009

Chocolate Ice Cream Cupcakes for My First Blog Event :)

DSC02538 2

Ice cream cupcakes.. Why didn't we meet sooner. This is such an amazing combination.
I was blog browsing a few days ago, and came across Yummy In My Tummy's post. Yummy in the tummy was the name I had first wanted for my blog, but every combination of the above words was taken:(
Of all the blogs with the above name, this is the only active one. And it is a great blog :)
I saw the ice cream cupcakes post, and immediately felt the need to make these and take part in the 2nd Annual Ice Cream Cupcakes Roundup hosted by Scoopalicious and Cupcake Project for myself too. I saw the due date - 31st May, and knew I had to hurry up and make these. Got them done just in time :) Whew! [Luckily, the time difference works in my favor].

Update - Please vote for my cupcake at Cupcake Project or Scoopalicious. You stand to win an an 8-pack of homemade cupcake birthday cards just for voting :-)

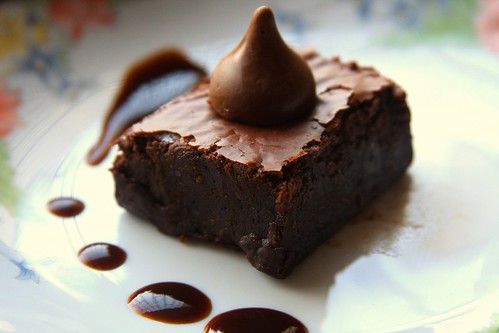
After the recent mango overload, I've been missing chocolate. And for a blogger who claims chocolate to be her first love, it doesn't seem right that there's only one post about chocolate as of now. So of course, I made chocolate cupcakes from another favorite book of mine, David Lebovitz's The Great Book of Chocolate :-) I added Baskin Robbin's Gold Medal Ribbon Ice Cream in the center, and topped off with Chocolate Caramel Ganache. It was pure heaven :) I also drizzled Hershey's Dulce De Leche Caramel Topping. You must try this, NOW! :)


DSC02525 2

Black-Bottom Cupcakes [I only used the chocolate cupcake part]
Adapted from The Great Book of Chocolate
Yield : 12 cupcakes

Buy from flipkart.com

1 1/2 cups (210 grams) all purpose flour
1 cup (210 grams) light brown sugar [I used regular castor sugar]
1/3 cup (30 grams) natural unsweetened cocoa powder (not Dutch processed)
1 teaspoon baking soda
1/4 teaspoon salt
1 cup (240 ml) water
1/3 cup (80 ml) unflavored vegetable oil (I used safflower)
1 tablespoon white vinegar
1 teaspoon pure vanilla extract
1/2 cup chopped semi-sweet chocolate [I prefer chopped chocolate because I can control the size, you can use chips too]

This is a very easy recipe to prepare.

  1. Preheat oven to 180 C [350 F]
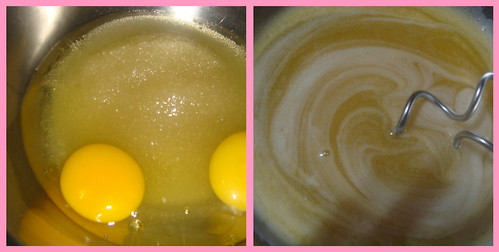
  2. In a large bowl, sift together flour, sugar, cocoa powder, baking soda, and the salt.
  3. In a smaller bowl, mix the water, oil, vinegar and vanilla.
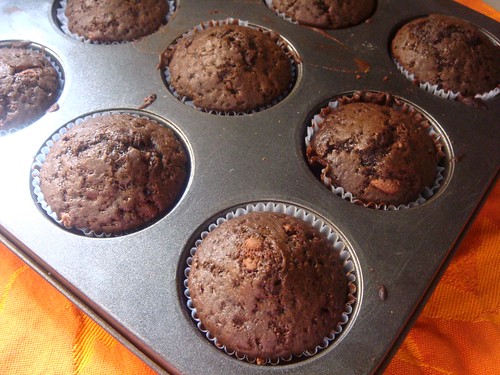
  4. Mix, and pour into muffin pan.
Bake for 25 minutes, or until the cupcakes feel springy to the touch, and a toothpick inserted into the centre comes out clean [Mine were done in 20 mins, so make sure you check them].

Remove from oven and place on a wire rack to cool.
These cupcakes can be stored in the refrigerator for about 3 - 4 days.

The weird thing about this recipe is that it contains no eggs, but it still tastes the same. A nice alternative for vegetarians/vegans.

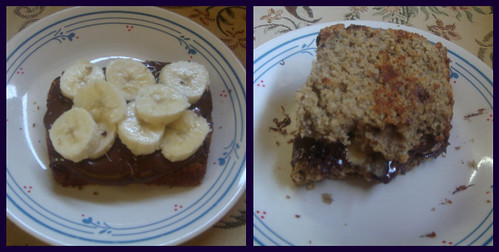
The instructions in the project mention filling the cupcake pan about half full. But since I was going for 'sandwich style' instead, I filled as usual. In hindsight, I probably should have listened to them, because -

DSC02544 2

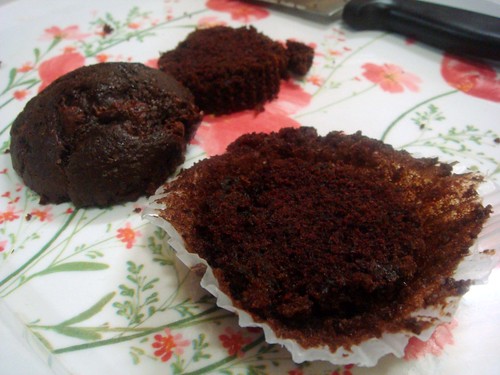
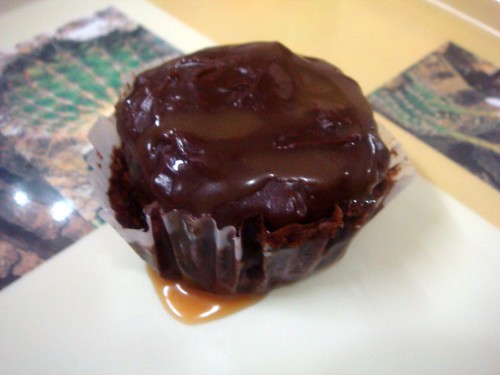
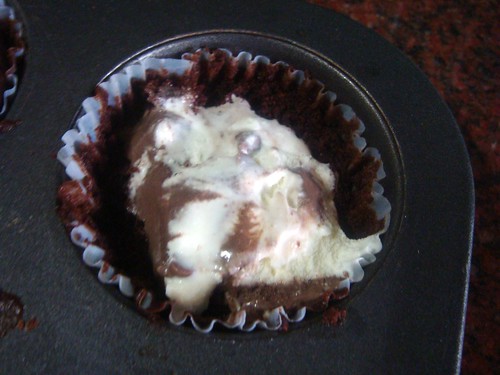
I had to cut great chunks out of the middle to ensure the cupcakes wouldn't become ginormous. I then returned them to the pan, and added the caramel/chocolate [I used two flavors] ice cream. The pan lends the much needed support, since the wrappers are off.

DSC02533 2

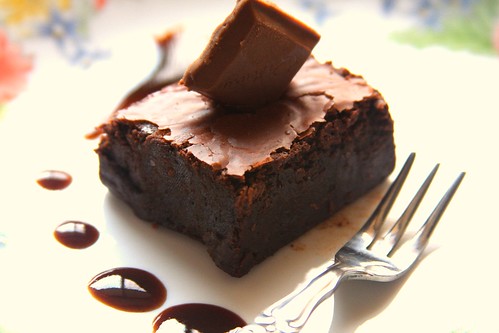
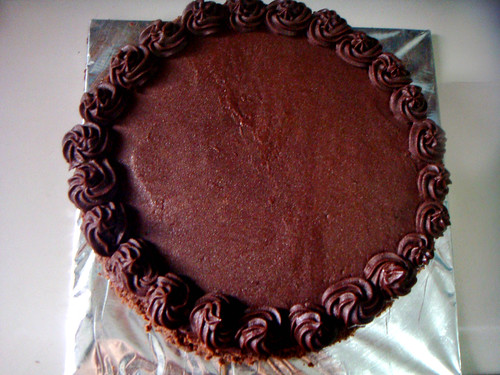
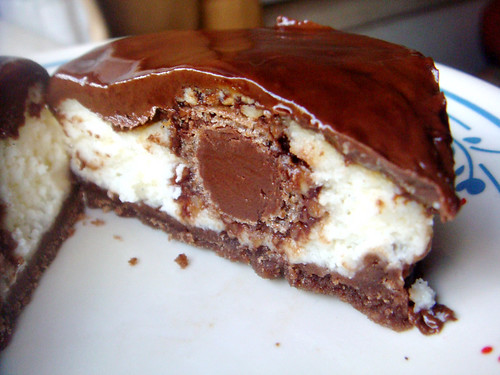
After this step, I covered the cupcakes with the chocolate caramel ganache -
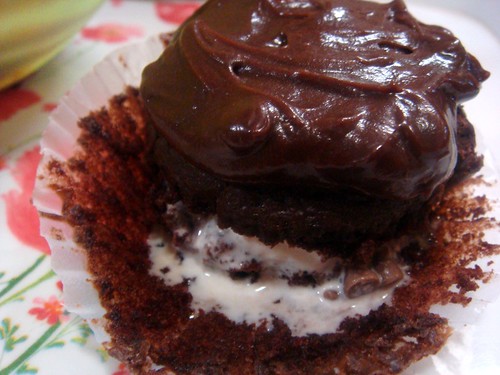
DSC02548 2

And there you go...
DSC02575 2
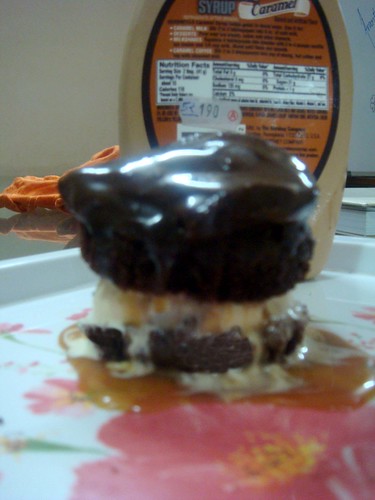
Since its so hot over here, I had the hardest time trying to click a picture without the ice-cream melting all over. Don't let the appearance deceive you, because these are the most gratifying things EVER! :)

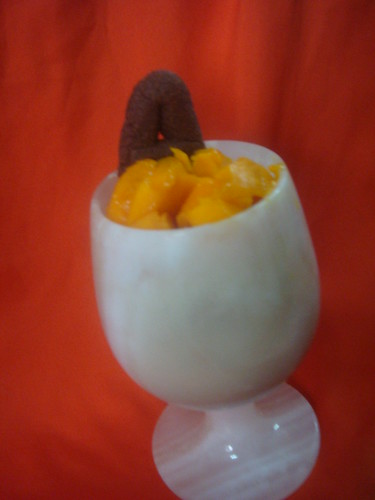
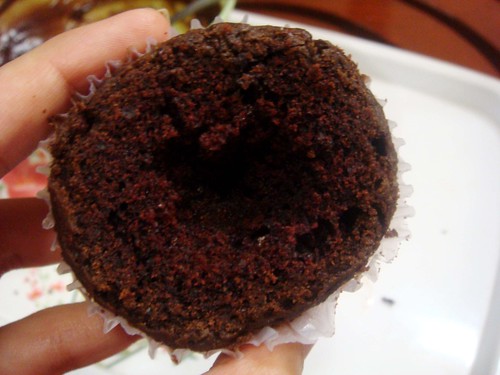
I also tried a few cupcakes in the way it was meant to be made, according to the hosts. Since I hadn't accommodated for the added height, I cut the tops off, and also made a hole for added ice cream deliciousness :)

DSC02552 2

And then, the ice cream -
DSC02555 2
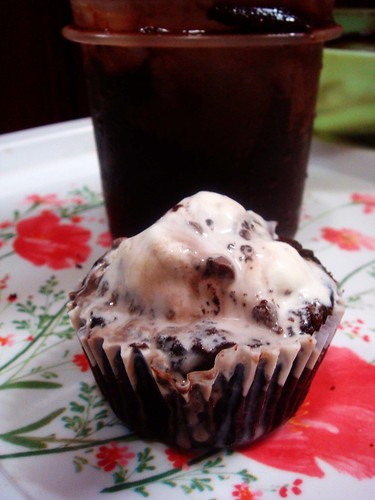
I topped this off with ganache after the ice cream had set a little, but I forgot to click a picture :(


DSC02561 2

Monday, May 25, 2009

Goodbye Mangoes.. I'll Miss you :(

Buffets and Receptions
DSC02503 2

Mangoes.. The best fruit ever in my opinion. Though I lovve living in India, I'm usually criticizing how backward it is in the matter of availability of good products used for baking. We don't even get any good brand of chocolate, I always have to beg people who are coming here from abroad to carry things for me. How I'd love to own a KitchenAid *sigh*
That's why I'm very happy about mangoes, you get the best Alphonso mangoes over here :-) It's the one thing that we have, and people from other countries want :P

I've eaten mangoes in every possible way, and incorporated them into most of the things I baked in these past few months, as you can see with the trifle, and the cake with lemon curd. The past 2 months have been amazing because of them. This recipe was made as a send-off of sorts, to mangoes. The rains are almost here, and that's when we stop getting good mangoes.

I haven't tried making too many pies, so I thought it would a great way to practice making a pie crust, and also, make my last mango food. I used Sherry Yard's recipe, from her amazing book The Secrets of Baking. Though I love the book, this recipe didn't turn out too well, but I can't say for sure that it wasn't because of me. But all combined, the pie, with the lemon cream, and the reduced mango puree, was delicious. The lemon cream recipe is one I'm going to be using a lot more often, it was out of this world :-)


DSC02498 2

Sherry Yard's Flaky Pastry for Double-Crust pastry.
I halved, and got enough pastry for 2 6 inch tarts, and a few mini tartelettes.

Flour 12.5 oz [2 3/4 cups]
Butter 8 oz [2 sticks]
Ice Water 4 oz [112 g] [1/2 cup]
Salt 1 tsp
Vinegar ½ tsp
Sugar 2 tbsp

  1. Sift flour, sugar and salt.together in a bowl.
  2. Cut butter into 1 inch cubes, and freeze for about 10 minutes. Add the butter to the flour mixture, and beat using mixer, or mix by hand, until pea- sized lumps are formed.
  3. Combine ice water and vinegar. Add to mixture. Beat until combined. Vary the amount of water depending on your location, the dough should lean towards moist rather than dry.
  4. Wrap dough using plastic wrap, refrigerate for atleast 1 hour before using.
This dough can stay refrigerated for 3 days, and can frozen for upto 2 weeks.

I blind baked the mini tartelettes in the last picture for 7 minutes, and the 6 inch ones for 15-17 minutes. They were done perfectly.

I made a lemon cream to go with the pastry, from a great book Buffets and Receptions. Though I don't use the entire book, only the baking section, it is probably my most favourite book. It has recipes for literally EVERYTHING, albeit without too many pictures. It's great for anyone who knows the basics, as it provides adequate, but not too detailed instructions.

Lemon Cream from Lemon Meringue Pie
Adapted from Buffets and Receptions

5 eggs
250 g [10 oz] sugar
225 g [8 oz/ 2 sticks] butter
20 ml lemon juice

  1. In a small saucepan, beat the eggs and sugar together.
  2. Soften butter to room temperature, add to the sugar mixture.
  3. Add lemon juice.
  4. Bring to a boil, stir until smooth, then refrigerate.

I added the cream the tarts, and topped one of them with chopped mangoes [you can top with any fruit, the flavor of the cream doesn't overwhelm it] . For the other, I used reduced mango puree [aamras in hindi]. All I did was heat 1 packet [500g] of mango puree in a saucepan until it became thick [about 15 minutes]. Just to be safe, I then added a teaspoon of cornstarch, and took off heat 2 minutes after that. On refrigeration, it became thick enough to be used as the topping for the tart. You could also use a mango [about 2] and process it, instead of the puree. If you choose to do this, make sure you strain to remove the threads.

DSC02509 2

Wednesday, May 20, 2009

When Life Gives You Smashed Up Cake, You Make.... Trifle!!

Yummy Triflfe :)


So I had the family over a few days ago.. I was all excited to display my new-found interest in cake decorating. I have read in many places that it it preferable to bake the cake a day ahead, so that it can be frozen, for added sturdiness. I tried Toba Garett's well reviewed Moist Yellow Cake recipe, that comes out white. There I was, cake all baked, and in the process of cooling, thinking it had cooled enough, and I tried loosening it from the sides. It came away from them pretty readily, so I pronounced it ready to come out of the pan.
Well... Turns out I couldn't be furthur from the truth. It had only cooled from the top, the bottom was steaming!! Almost the entire bottom of the cake was still in the pan, and there was a ginormous hole in the cake. Lesson to be learnt - LET YOUR CAKES COOL!! I wish I had a picture to show you, but I was just too disheartened at the time.
The cake still tasted good though, and I just couldn't bring myself to bake another one. So I decided to make trifles, probably the only use of smashed up cake other than cake pops.

As it turns out, this was the best thing that could have possibly happened, since the trifle tasted wayy better than any cake ever could. It was a perfect mixture in all aspects - taste, texture, etc. From now on, I'm going to be smashing up cakes on purpose! :P

To make the trifle, you will need -
1 8 inch cake [recipe follows, box mix will also do]
1 recipe pastry cream
Fruits of your choice [I used mangoes]

For the cake -

Yield - 2 8 inch cakes
3 cups [330 g] cake flour
1 tbsp baking powder
1/2 tsp salt
2 sticks [230 g] unsalted butter [I used salted, and omitted salt]
2 cups [454 g] sugar
5 large eggs
2 tsp vanilla extract
1 1/4 cups [300 ml] buttermilk

Method:

  1. Preheat to 350 F [175 C]. Butter and line two 8x2 inch cake pans.
  2. In a medium bowl, sift together the flour. baking powder, and salt.
  3. Cut up the butter into 1-inch pieces and place them in the large bowl of an electric mixer, fitted with a paddle attachment or beaters. Beat for 3 minutes on MEDIUM-HIGH speed until the butter is light and creamy in color. Stop and scrape the bowl. Cream the butter for an additional 60 seconds
  4. Add the sugar, 1/4 cup at a time, beating 1 minute after each addition. Scrape the sides of the bowl occasionally. Add the eggs one at a time.
  5. Reduce the mixer speed. Stir vanilla into the buttermilk. Add the dry ingredients alternately with the buttermilk. Mix just until incorporated. Scrape the sides of the bowl and mix for 15 seconds longer.
  6. Spoon the batter into the prepared pan and smooth the top with a knife. Lift up the pan with the batter, and let it drop onto the counter top to burst any air bubbles, allowing the batter to settle.
  7. Center the pans onto the lower third of the oven and let bake 45 to 50 minutes or until the cake is lightly brown on top and comes away from the sides of the pan and a toothpick inserted in the center comes out clean.


To make the pastry cream:

1 litre milk
3/4 cup [150 ml] cream
8 large egg yolks
10 tbsp [150 g] sugar
1/4 cup corn starch
1/4 tsp salt
1 tsp vanilla
2 tbsp unsalted butter

  1. In a large saucepan, bring the milk and cream to a boil.
  2. Whisk the egg yolks, sugar, corn starch, salt, and vanilla in a bowl.
  3. Slowly pour a little of the hot milk into the eggs, whisking constantly.
  4. Return the mixture to the saucepan.
  5. Cook over medium-low heat, stirring, until the mixture just reaches a boil, and the mixture coats the back of the spoon.
  6. Strain over a bowl, let cool for a while.
  7. Stir in the butter, and cover with plastic wrap to prevent skin formation.
  8. Refrigerate, use within 3 days


To assemble the trifle -
Since I had about 15 people coming over, I decided it would be much neater to serve them in individual glasses.

1. Cut the cake up into small pieces. Layer into the bottom of the glass.
2. Pour about 3 tbsp of pastry cream next.
3. Cut up whatever fruit you want to use, and add them.
4. Repeat.
5. Add a dollop of whipped cream, and sprinkle chocolate shavings. [I used the chocolate snaps I made earlier]

DSC02490

Saturday, May 16, 2009

Decorate Cookies Like the Pros... Cheating :P

DSC01978 copy

I’ve always admired how people can take a simple sugar cookie and transform it into a work of art. Some of the creations are absolutely beautiful. I’d love to be able to do even 1% of what they do, but I can’t :(. I’m taking it up as a challenge, and WILL decorate cookies with royal icing at some point of time.
But until then , I’m going to rely on TRIOS – I love them. They are my favourite thing to take to a party, because people can’t stop gushing about the cuteness :D And an added bonus is that I love looking at them, too.
I first made trios when I had to take something to a party, and decided it was time to take something that didn’t involve chocolate, and looked great too. I’d seen the recipe around a lot, and it was on top of my to try list. I’ve made it manyy times since, and everytime I just marvel at how easy they are. After making it a few times, I can have them ready in about 2 hours [from making the dough, to them being ready to eat] – a far cry from the *almost* 5 hours that I took the first time,

TRIOS
Adapted from gourmet

yield: Makes about 3 1/2 dozen cookies
Ingredients

2 1/2 cups all-purpose flour
1 teaspoon salt
2 sticks (1/2 pound) unsalted butter, softened
1 cup sugar
1 large egg
1 teaspoon pure vanilla extract
About 2 tablespoons seedless raspberry jam
About 2 tablespoons apricot preserves
About 2 tablespoons strawberry preserves [Use any 3 jams you have handy, just make sure they aren't too similar colorwise]
Equipment: a 1/2-inch-thick wooden spoon handle or dowel


DSC02481

Instructions -
Make dough:
1. Cream butter and sugar using a mixer until pale and fluffy. Add eggs one at a time, beating in between additions. Beat vanilla in.
2. Sift together the flour and salt. Add in 3 parts to the butter mixture.
3. Wrap dough in plastic wrap, and refrigerate until firm, or atleast 1 hour.

Assemble and bake cookies:
Preheat oven to 350°F with rack in middle. Line 2 large baking sheets with parchment paper.
Roll 3 separate level teaspoons of dough each into a ball, then flatten each ball slightly (to 1 inch wide and less than 1/2 inch thick). Arrange them in a triangle on baking sheet with edges touching in center, then make a deep indentation in center of each round with wooden spoon handle. Make more cookies, arranging them 1 inch apart on baking sheets.
Fill each indentation with jam, using a teaspoon. - I found it much easier to cut a hole in a bag and pipe it out. Make sure not to overfill. You might want to try a few first, to get the exact amount.
Bake until cookies are baked through and golden-brown on edges, 15 to 20 minutes. Cool on baking sheets 5 minutes, then transfer to racks to cool completely.


DSC02085 1

Sunday, May 10, 2009

Healthy Banana Oat Bread for Mother's Day

Banana Oat Bread

First off, happy mother's day to all the mothers out there. I have been blessed in that I have not one, but two mothers, i.e. my grandmother. She's the sweetest soul there is, and yesterday I thought of baking something they would both like. My mom is tired of all the rich, decadent, fattening things I keep baking. My grandmom, on the other hand, loves them [actually anything I make], but the has the tiniest appetite EVER! If I were to give her something of the sort I usually bake, it would stay in her home for weeks!
So as a kind of balance, I chose a healthy banana bread. My favorite chocolate chip cookies use a minuscule amount of oats as an ingredient, so as a result I always have a LOT of it at home, going to waste. Since this recipe used oats, that was a big plus, and it would satisfy my mom, who's always nagging me to use them up.

Healthy Banana Oat Bread
Adapted from All recipes.
Makes 2 mini-loaf tins

1 cup sugar
7 tbsp oil
2 large eggs
1 1/2 cup bananas [about 2 large]
1 cup oats
1/2 c milk [can use skim]
2 cup whole-wheat flour
1 tbsp baking powder
1/2 tsp baking soda
1/2 tsp salt
1/2 tsp cinnamon

Preheat oven to 350 degrees.
Picnik collage

Combine first 4 ingredients in a large bowl; beat well at medium speed of a mixer. Combine banana, oats, and milk; add to sugar mixture, beating well. Lightly spoon flour into dry measuring cups; level with a knife. Combine flour, baking powder, baking soda, salt, and cinnamon; stir with a whisk. Add to sugar mixture; beat just until moist. Spoon batter into a 9 x 5-inch loaf pan coated with cooking spray.

Picnik collage 2

Bake at 350 degrees for 1 hour and 10 minutes or until a wooden pick inserted in center comes out clean. Cool 10 minutes in pan on a wire rack; remove from pan. Cool completely on wire rack.

The bread was yummy, it didn't taste healthy at all :). It had a nice texture, soft, but nor crumbly, and would be a perfect accompaniment with tea/coffee. Or you can eat it in my favourite way, slightly toasted, and then used as a sandwich with nutella and more bananas :) Yumm.. Try it, you'll love it too.

Update : This is best eaten after a day. Right after baking, it seemed a little dry, something that I couldn't eat without something to go along with it. The bread moistens, I think that's because of the oats, but I can't be sure. It tasted sooo good the next day, even I could eat it plain, and I usually keep away from things that aren't rich, buttery or chocolatey :)


Picnik collage 3

Thursday, May 7, 2009

Cake baking/decorating course, super-confident me

As I've mentioned before, I have just started to go beyond just baking the cake, and have ventured into the decorating area! Its been about a month since I decorated my first cake, which tasted great, and had a yummy mango curd filling, but was a failure in that the buttercream tasted off. I scraped it off later, and covered with ganache so it would be edible. Here's a pic -

My first decorated cake!!! - 07.04.09

I must warn you, long post coming up!!
After this I was on the lookout for courses that would improve my miserable skills. While I've joined a fondant/gumpaste course, it won't be starting up until next month. A little more looking around and I found a 3 hour course on cake baking and decorating. Though I didn't want to learn anything about the baking, I figured I'd go for the decorating, and may pick up a few tips on the way. Which I did! The lady added glycerine to the cake batter, she said it helps with the shine. Has anyone heard of this/is it recommended?

It was after the baking of the cakes was over that I started feeling nervous. And it wasn't even like it was supposed to be an in-depth course. Just the basics. But my mind was totally screaming - 'get out now, fake an illness'. Somehow I managed to shut that voice up, and braved on.

DSC02322

Yeah, that's whipped cream, for some reason buttercream isn't really popular here in India, all of the bakeries that I've asked said they use whipped cream or ganache.
Anyway she taught us a number of ways to use the star tip. Did you know there are more than 10 ways to do that! I got about 5 done almost perfect, as you can see in the picture above. The rest... well lets just say that 5 ways are enough for me. If you want to learn this, there's a very informative video on youtube, that has all the different ways. I can't seem to find the link right now, I'll update as soon as I do.
Update - found the video

Basketweave

That's the basketweave, which I felt was the easiest tip to use, but still giving the most elaborate results. I got it done in 2-3 tries. :) I could also understand the pain of doing this all over the sides of a cake. I'm in awe of people who do that everyday.

Fresh cream cake on pg 1

That was decorated by another student, who seemed to only want to use the leaf tip all over :P. We learnt how to use fruits as a filling, something that I will begin to implement ASAP. At this point I feel its necessary to say that though I've done a lot of baking over the past year or so, I've only just started cakes. So even that was something new for me.

Eggless Chocolate Cake

Obviously I've saved the best for the last. The rose. That rose. On the cake. Is mine :-) I was soo proud. Since I was doing so well with the rose, she gave the sides to the previous girl's sister, who seemed to love the grass tip :P What is it with those two and using just 1 tip. But I did notice that while the rose looked exactly like how she showed us, the method and the final outcome was quite different from what I've seen on YT videos that teach the same thing. Anyway, I was happy with it as it was, and now I have the confidence to use the YT videos to learn, and not just watch.

So with this course I may not have learnt too much, but it gave me the much needed confidence boost to enter in into the decorating area. Thanks, Mahek. :-)

Monday, May 4, 2009

Welcome and my favourite brownies

Hey there! First off, I have to say, welcome to my blog. I love having you over. I am dedicated to bake through all the various types of sweet bakes there are, and giving constructive and true reviews to you.

sensual lovee :)

The perfect way to begin my blog is to go back to what made me want to bake for the first time in my life. About 10 years ago, my chocoholic genes kicked into gear, and I sat in front of my mom whining about how there was no chocolate in the house. Since my mom occasionally [read rarely] bakes, and wanted me to begin baking myself, she handed me her favourite chocolate cookbook,
Mable Hoffman's Chocolate Cookery, [a great book, by the way] and told me to choose a recipe. I chose the fudge brownies, and they came out great, mostly because it was my mom who was doing the baking, with me watching/learning, thus sowing the seeds of my true love :)

my super secret brownies


10 years and many burnt blobs, rock hard brownies used as paperweights later, I have finally achieved success in creating my own brownie recipe that is raved about. It's the perfect blend of chewy and fudgy, and is rich, but just so. Sorry, but this is the one and only recipe I won't be sharing , as if I ever win a lottery and open a bakery, this will be what I will rely on. A girl can dream, can't she? All I can tell you is that it involves a lot of chocolate.

I may be able to make these amazingly well [as you can see, I suck a modesty], I couldn't, for the love of anything that is holy, take good pictures of them. The pictures always made them look like dirty blobs, some even looking like *ahem* turd, I asked a friend to click them for me. He's got one of those professional camera thingies, and some MAD photography skills, as you can probably see. Thank you so much Zainul :-)

IMG_7191 copy


About Yumsilicious Bakes


Hi there. Welcome to my blog. I'm Avanika, a 22 year old from Bombay, currently in the UK to do my Masters in Marketing and Strategy

YumsiliciousBakes is the result of my attempts to join my two favourite things - baking, and the internet. This site is a way to record my attempts - successful or not. If you're wondering about the yumsilicious part, that's just my way of giving the highest possible rating to a particular food item, and a word I absolutely love using, because if I'm saying it, it means I've found heaven. :-)

I've dappled at cake decorating, however I don't use it as much since everything I bake has to ultimately appeal to me, and I've somehow always found the rustic looking cakes much harder to resist.
 

I will work in the corporate world a few years, and then I hope to go to a culinary school once I've gained enough life experience, to ultimately open my own bakery back in Bombay.

 
For any PR or advertising inquiries, or to simply drop a hello [which I love], please email me at yumsiliciousbakes (at) gmail (dot) com
Related Posts with Thumbnails